• Skip to primary navigation
  • Skip to main content
  • Instant Pot Recipes
    • Instant Pot Main Dish
    • Instant Pot Side Dish
    • Instant Pot Drinks
    • Instant Pot Soups
    • Instant Pot Breakfast Recipes
    • Instant Pot Drinks
    • Instant Pot Dessert Recipes
  • Contact

What's in the Pot logo

You are here: Home / Blog

Blog

February 22, 2024 Instant Pot Side Dish

How to Can Tomatoes in the Instant Pot

With the convenience of an Instant Pot, canning tomatoes becomes a simpler and more efficient process. Whether you have a surplus of tomatoes from your garden or want to take advantage of a great deal at the local market, this informative article will guide you through the step-by-step process of canning tomatoes using your Instant Pot.

how to can tomatoes in the instant pot

Preserving the vibrant flavors of summer tomatoes can be a rewarding experience, and with the help of an Instant Pot, it becomes even more convenient for regular home cooks.

Canning tomatoes allows you to enjoy the taste of freshly harvested tomatoes all year round, adding depth to your soups, sauces, and other culinary creations.

In this article we will guide you through the step-by-step process of canning tomatoes using your Instant Pot.

With proper techniques and a little effort, you’ll soon become adept at preserving the essence of ripe tomatoes and savoring their goodness throughout the seasons.

Gather Your Supplies

Before diving into the canning process, ensure you have all the necessary supplies.

This includes:

  • fresh tomatoes
  • canning jars
  • canning lids
  • bands
  • a jar lifter
  • a canning funnel
  • a ladel
  • large pot for blanching
  • sharp knife
  • cutting board
  • cleaning kitchen towel
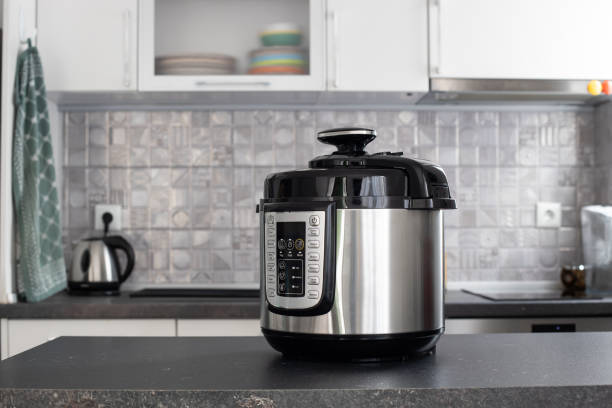
  • Instant pot

Preparing the Tomatoes

Wash the tomatoes thoroughly and remove any blemishes or bruises.

Blanch the tomatoes by boiling them for about 30 seconds and then transferring them to an ice bath. This process will help loosen the skins, making them easier to peel.

Peeling and Deseeding

Once the tomatoes have cooled, gently peel off the skins using a sharp knife or your fingers.

Cut the tomatoes in half horizontally and scoop out the seeds and excess juice, as they can affect the quality of the canned tomatoes.

Sterilize the Jars

Ensure your canning jars, lids, and bands are sterilized.

You can do this by running them through a dishwasher cycle or submerging them in boiling water for 10 minutes.

Keep the jars warm until they are ready to be filled.

Filling the Jars

Using a canning funnel, carefully pack the prepared tomatoes into the sterilized jars, leaving a 1/2-inch headspace at the top. Remove any air bubbles by gently running a utensil along the sides of the jar. Wipe the rims of the jars with a clean, damp cloth.

Processing in the Instant Pot

Place the filled jars in the Instant Pot on a trivet or a canning rack.

Add water to the Instant Pot, ensuring it covers the jars by about 1 inch.

Follow the manufacturer’s instructions for setting up the canning function on your specific model.

Sealing and Cooling

Once the canning process is complete, carefully remove the jars from the Instant Pot using a jar lifter and place them on a kitchen towel.

Allow the jars to cool undisturbed for 12 to 24 hours.

During this time, you’ll hear the satisfying “pop” sound as the lids seal.

Testing the Seal and Storage

After cooling, check the seals by pressing the center of each lid. I

f it is firm and does not flex, the seal is successful.

Label the jars with the canning date and store them in a cool, dark place. Properly sealed and stored canned tomatoes can be enjoyed for up to a year.

Canning tomatoes in your Instant Pot is a wonderful way to capture the essence of fresh tomatoes and extend their shelf life.

By following the steps outlined in this guide, you can confidently preserve your tomato harvest and enhance your culinary creations throughout the year.

Enjoy the satisfaction of knowing that your homemade canned tomatoes will bring the taste of summer to your kitchen, no matter the season.

February 22, 2024 Instant Pot Tips

How To Sprout Seeds in an Instant Pot

Get ready to witness the magic of sprouting seeds in the Instant Pot—where innovation meets nature’s abundant gift. Let’s begin this adventure together and embark on a culinary exploration that will forever transform the way you see and savor your food.

how to sprout seeds in instant pot

Sprouting seeds is a simple and rewarding way to add fresh and nutritious sprouts to your meals.

While traditional sprouting methods involve using jars or trays, you can also harness the versatility of your Instant Pot to expedite the sprouting process.

In this article, we will provide a step-by-step guide on how to sprout seeds using an Instant Pot, allowing you to enjoy homegrown sprouts with minimal effort.

What does it mean to sprout seeds?

Sprouting seeds refers to the process of germinating seeds to initiate the growth of a new plant. It involves soaking the seeds in water until they begin to sprout and develop tiny roots and shoots. Sprouting is typically done for edible seeds, such as legumes (e.g., lentils, mung beans), grains (e.g., wheat, quinoa), and certain types of nuts and seeds (e.g., alfalfa, broccoli, sunflower).

By sprouting seeds, you can enhance their nutritional value, improve digestibility, and unlock their potential for culinary use.

The process of sprouting can vary depending on the type of seed, but it typically involves soaking the seeds in water, rinsing and draining them at regular intervals, and providing a suitable environment for germination, such as a warm and moist setting.

With proper care and attention, you can sprout seeds at home and enjoy the benefits of these nutrient-dense sprouts in your diet.

Are sprouts nutritious?

Sprouts are highly nutritious and packed with essential vitamins, minerals, antioxidants, and enzymes.

They are often considered a “living food” due to their active enzymes, which aid digestion and promote overall health. Sprouts also offer a fresh and crunchy texture, vibrant flavors, and can be used in a variety of culinary applications, including salads, sandwiches, stir-fries, and smoothies.

Why should you sprout seeds in a Instant Pot?

Sprouting seeds in an Instant Pot offers several advantages that make it an appealing option for home sprouting enthusiasts. Here are some reasons why you might choose to sprout seeds in an Instant Pot:

Time Efficiency

The Instant Pot can expedite the sprouting process compared to traditional methods. The yogurt function in an Instant Pot provides a consistent warm environment, promoting faster germination and sprouting of seeds. This means you can enjoy fresh sprouts in a shorter amount of time.

Temperature Control

The Instant Pot’s yogurt function allows you to set a specific temperature, ensuring optimal conditions for sprouting seeds. Consistent warmth is crucial for the sprouting process, as it stimulates seed germination and encourages the growth of healthy sprouts. The Instant Pot helps maintain a controlled temperature, creating ideal conditions for successful sprouting.

Convenience and Versatility

Utilizing an Instant Pot for sprouting seeds offers convenience and versatility. The Instant Pot is a multi-functional appliance that many people already have in their kitchen. By using it for sprouting, you can maximize the use of your Instant Pot and save space by eliminating the need for additional sprouting equipment.

Reduced Risk of Contamination

Sprouting seeds in a closed and controlled environment like the Instant Pot can help minimize the risk of contamination. The sealed container inside the Instant Pot protects the sprouts from external pollutants and reduces the chances of exposure to harmful bacteria. This can lead to safer and more hygienic sprouting results.

Consistent Results

The Instant Pot’s consistent temperature control and controlled environment can contribute to more predictable and consistent sprouting results. This is particularly beneficial if you want to achieve uniform sprout growth and quality for culinary or aesthetic purposes.

Experimentation and Exploration

Using an Instant Pot for sprouting seeds allows you to explore a wide variety of sprout types and experiment with different seed varieties. You can easily sprout seeds like alfalfa, broccoli, mung beans, lentils, and more, expanding your culinary options and adding fresh, nutritious sprouts to your meals.

Year-Round Sprouting

The Instant Pot enables you to sprout seeds regardless of the season or weather conditions. It provides a controlled environment that is not dependent on natural sunlight or outdoor temperatures. This means you can enjoy homegrown sprouts all year long, regardless of external factors

How to sprout seeds in your Instant Pot

What You’ll Need:

  1. Instant Pot with a Yogurt Function: The Instant Pot model you use should have a yogurt function, as this function provides a consistent warm environment required for sprouting.
  2. Sprouting Seeds: Choose high-quality organic sprouting seeds of your choice, such as alfalfa, broccoli, mung beans, or lentils. Ensure the seeds are suitable for sprouting and have not been treated with chemicals.
  3. Sprouting Container: Select a food-grade, non-reactive sprouting container that fits comfortably inside your Instant Pot. A stainless steel mesh sprouting insert or a glass jar with a mesh lid are good options.
  4. Water: You’ll need clean, filtered water for rinsing and sprouting the seeds.

Step-by-Step Guide to Sprouting Seeds in an Instant Pot

  1. Rinse the Seeds: Start by thoroughly rinsing the sprouting seeds under running water to remove any debris or impurities.
  2. Soak the Seeds: Place the rinsed seeds in a bowl and cover them with water. Allow the seeds to soak for the recommended duration specified for the particular seeds you’re using. This typically ranges from 4 to 12 hours.
  3. Drain the Soaked Seeds: After the soaking time is complete, drain the water from the seeds using a fine-mesh sieve or colander. Ensure the excess water is completely drained to prevent the seeds from becoming waterlogged.
  4. Transfer Seeds to the Sprouting Container: Transfer the drained seeds to your sprouting container, spreading them out evenly. Avoid overcrowding to allow proper air circulation.
  5. Insert the Sprouting Container in the Instant Pot: Pour a small amount of water into the inner pot of the Instant Pot. Place the sprouting container with the seeds inside the Instant Pot, ensuring it is stable and the seeds are not submerged in water.
  6. Activate the Yogurt Function: Close the Instant Pot lid and select the yogurt function. Adjust the incubation time to 8 to 12 hours, depending on the type of seeds and desired sprout length. This warm and controlled environment will facilitate sprouting.
  7. Rinse and Drain: After the incubation period, carefully remove the sprouting container from the Instant Pot and rinse the sprouts under running water. Gently swish and agitate the sprouts to remove any residual seed hulls or debris. Drain the excess water thoroughly.
  8. Repeat Rinsing and Draining: Rinse and drain the sprouts 2-3 times a day, ensuring they remain moist but not waterlogged. Return the sprouting container to the Instant Pot during the incubation periods between rinsing cycles.
  9. Harvest and Store: Once your sprouts have reached the desired length, typically 3-5 days, harvest them by cutting or plucking them from the sprouting container. Rinse them one last time and allow them to drain thoroughly. Store the sprouts in a clean, airtight container in the refrigerator.

Using an Instant Pot to sprout seeds provides a convenient and controlled environment for cultivating fresh and nutritious sprouts.

By following this step-by-step guide, you can enjoy homegrown sprouts with minimal effort.

Experiment with different seed varieties and incorporate these crunchy, flavorful sprouts.

June 19, 2023 Instant Pot Tips

How To Clean A Burnt Instant Pot

Cooking can be a delightful and fulfilling experience, but sometimes accidents happen in the kitchen. One common mishap is ending up with a burnt Instant Pot after a culinary adventure. The sight of burnt-on residue can be disheartening, but fear not! In this guide, we will provide you with valuable tips and techniques to effectively clean a burnt Instant Pot.

how to clean a burnt instant pot

Cooking mishaps happen to the best of us, and dealing with a burnt Instant Pot can be quite a challenge.

In this informative article, we will guide you through a step-by-step process on how to effectively clean a burnt Instant Pot.

With a little patience and some handy tips, you’ll have your Instant Pot sparkling clean and ready for your next culinary adventure.

How to clean a burnt Instant Pot

Safety First

Before you begin cleaning, ensure that the Instant Pot is unplugged and completely cooled down. Safety is of utmost importance to prevent any accidents or injuries during the cleaning process.

Assess the Damage

Take a closer look at the burnt Instant Pot to determine the severity of the situation. If the burnt residue is mostly dry, proceed to Step 3. If the residue is still wet or sticky, follow the substeps below: a. Fill the Instant Pot with warm water and let it soak for about 30 minutes to loosen the residue. b. After soaking, proceed to Step 3.

Gentle Scrubbing

To avoid damaging the Instant Pot’s inner coating, use non-abrasive cleaning tools such as a soft sponge, nylon brush, or non-scratch scrubber. Avoid using steel wool, abrasive cleaners, or sharp objects that can scratch or chip the surface.

Homemade Cleaning Solution

Create a gentle yet effective cleaning solution using ingredients readily available in your kitchen. Combine equal parts of white vinegar and water in a bowl or spray bottle. Vinegar helps to break down stubborn burnt-on residue without harming the Instant Pot.

Soak and Scrub

Dampen the soft sponge or scrubber in the vinegar-water solution and apply it to the burnt areas of the Instant Pot. Allow the solution to soak for a few minutes, as it will help further loosen the burnt residue.

Scrubbing Technique

Gently scrub the burnt areas in a circular motion, applying light pressure. Avoid scrubbing too vigorously, as it can damage the Instant Pot’s coating. If needed, reapply the vinegar-water solution to keep the burnt areas moist while scrubbing.

Rinse Thoroughly

Once you have successfully removed the burnt residue, rinse the Instant Pot with warm water to remove any remaining cleaning solution. Pay close attention to ensure all the residue is completely washed away.

Drying

After rinsing, pat the Instant Pot dry with a clean towel or allow it to air dry naturally. Make sure there is no moisture left on the surface to prevent any potential damage or corrosion.

Cleaning a burnt Instant Pot may seem like a daunting task, but with the right approach and a little bit of effort, it can be easily accomplished.

Remember to take your time, be patient, and follow the steps outlined in this article.

With practice, you’ll become a pro at restoring your Instant Pot to its former glory.

Happy cooking!

recipes you may enjoy:

  • Instant Pot Chicken Tikka Masala
  • Instant Pot Chicken Alfredo
  • Easy Instant Pot Honey Garlic Chicken Recipe

June 19, 2023 Instant Pot Side Dish

How To Can Pickles in the Instant Pot

Canning pickles is a great way to preserve the taste of fresh cucumbers all year round. It’s a time-honored tradition that dates back centuries, and with the rise of the Instant Pot, it’s now easier than ever to do it yourself at home.

Summertime and canning pickles go hand-in-hand. As a parent, you remember the sense of accomplishment in making a jar of flavorful pickles that you can serve for the rest of summer months.

But have you ever heard about canning with an Instant Pot? If this is foreign to you, don’t worry!

This blog post will introduce the art and science of using your Instant pot appliance to nourish your family in less time than ever before – while still getting all the flavor that comes from traditional brined pickling!

The Instant Pot is a versatile kitchen appliance that can be used for a wide variety of cooking tasks, including canning.

While traditional canning methods require a large pot and a lot of boiling water, the Instant Pot simplifies the process by allowing you to pressure can your pickles with ease.

To get started, you’ll need a few things.

First, you’ll need:

  • fresh cucumbers
  • pickling salt
  • vinegar
  • dill
  • garlic
  • other spices you want in your pickling brine

You’ll also need:

  • canning jars
  • lids
  • rings
  • Instant Pot with a a canning function

Begin by preparing your pickling brine.

Combine vinegar, water, pickling salt, and your choice of spices in a large pot, and bring to a boil.

While the brine is boiling, prepare your cucumbers by slicing them into spears or rounds.

Fill your jars

Next, fill your canning jars with the cucumbers and add any additional spices or seasonings you want.

Pour the brine

Then, pour the hot pickling brine over the cucumbers, leaving about a half-inch of headspace at the top of the jar.

Place jars in the Instant Pot

After you’ve filled your jars, place them in the Instant Pot.

Make sure the jars are spaced apart and not touching each other, and that there is enough water in the Instant Pot to cover the jars by at least an inch.

Canning Function

Then, use the canning function on your Instant Pot to process the pickles.

How to use the canning function:

The processing time will depend on the size of your jars and the altitude of your location, so be sure to consult a trusted canning guide for specific instructions.

Using the canning function on an Instant Pot is a simple process, but it’s important to follow the manufacturer’s instructions carefully to ensure that your food is safely preserved.

Here are the general steps to use the canning function on an Instant Pot:

  • Add enough water to the Instant Pot to cover the jars by at least an inch. Do not add too much water, as this can cause the jars to float and can affect the canning process.
  • Close the Instant Pot lid and lock it in place. Make sure the pressure release valve is set to “Sealing”.
  • Turn on the Instant Pot and select the “Canning” function. The time and pressure will be automatically set based on the altitude of your location and the size of your jars.
  • The Instant Pot will begin heating up and building pressure. Once it reaches the correct pressure, the timer will start counting down.
  • When the timer is up, the Instant Pot will automatically switch to the “Keep Warm” function.

After the processing time is up

Once the processing time is up, allow the Instant Pot to depressurize naturally for about 10-15 minutes before removing the jars.

Check the seals

Finally, check the seals on the jars to make sure they have properly sealed. If any jars have not sealed, they will need to be reprocessed or stored in the refrigerator and consumed within a few weeks.

Canning pickles in the Instant Pot is a great way to preserve the taste of fresh cucumbers and enjoy them all year round.

With a little bit of preparation and the right equipment, you can create delicious homemade pickles that are sure to impress.

Using the canning function on an Instant Pot can be a great way to preserve your favorite foods and enjoy them all year round. Just remember to always follow the manufacturer’s instructions and use caution when handling hot jars.

Here are some of my favorite Instant Pot Dessert Recipes:

  • Instant Pot Peppermint Cheesecake
  • Caramel Popcorn
  • Peaches and Cream Rice Pudding
  • Chocolate Fondue
how to can pickles in the instant pot

June 19, 2023 Instant Pot Tips

Why Is My Instant Pot Not Heating?

If you find that your Instant Pot isn’t heating up properly, it can be frustrating and inconvenient, especially when you’re eager to prepare a delicious meal. Several factors could contribute to this issue, however by following a few troubleshooting steps, you can identify and potentially resolve the problem, allowing you to get back to enjoying the convenience and efficiency of your Instant Pot.

The Instant Pot has gained immense popularity for its convenience and ability to cook a variety of meals. However, like any kitchen appliance, it is prone to malfunctions.

If you find that your Instant Pot is not heating properly or not heating at all, several factors could be contributing to the issue.

In this article, we will explore common reasons why your Instant Pot might be experiencing heating problems and provide troubleshooting solutions to get it up and running again.

Why isn’t my Instant Pot heating?

Power Supply

One of the most common reasons for an Instant Pot not heating is a faulty power supply.

Make sure your Instant Pot is correctly plugged into a functioning power outlet and that the power cord is securely connected.

Try using a different outlet or plugging in another appliance to verify if the issue lies with the outlet itself.

Circuit Breaker

If your Instant Pot is not heating at all, it’s possible that the circuit breaker for that specific outlet has tripped.

Check your circuit breaker panel and reset any tripped breakers. If the problem persists, consult a qualified electrician to investigate the electrical wiring in your kitchen.

Lid Misalignmet

The Instant Pot’s lid plays a crucial role in maintaining pressure and allowing the appliance to heat properly.

Ensure that the sealing ring is properly seated, and the lid is correctly aligned and locked in place.

Any gaps or misalignment could lead to heat loss, resulting in the Instant Pot not reaching the desired temperature.

Steam Release Valve

The steam release valve is another component that can cause heating issues.

If the valve is not properly sealed or has debris blocking it, pressure won’t build up inside the pot, and the unit may fail to heat.

Clean the steam release valve thoroughly and ensure it moves freely.

Overheating Protection

The Instant Pot is equipped with safety mechanisms to prevent overheating. I

f the pot detects excessive temperature or a malfunction, it will shut off to protect against damage.

Check if the display shows an error code indicating overheating, and allow the Instant Pot to cool down before attempting to use it again.

Faulty Heating Element:

Faulty heating element can be a significant cause of heating problems.

If all other troubleshooting steps have been exhausted, it’s possible that the heating element itself is defective. In such cases, it is recommended to contact the Instant Pot manufacturer or authorized service center for repair or replacement.

If your Instant Pot is not heating properly or not heating at all, don’t panic.

By following the troubleshooting steps mentioned above, you can often identify and resolve the issue without needing to replace the entire appliance.

However, if the problem persists or you are uncertain about performing any repairs yourself, it is advisable to seek assistance from a professional.

Enjoy the convenience and delicious meals that your fully functional Instant Pot can provide once the heating issue is resolved.

more articles you may enjoy:

  • How Long Does An Instant Pot Take To Preheat?
  • Easy Instant Pot Butternut Squash Apple Soup Recipe
  • Easy Instant Pot Tomato Soup Recipe
why is my instant pot not heating up

June 19, 2023 Instant Pot Tips

The Difference Between Sous Vide Cooking and an Instant Pot

Sous vide and the Instant Pot are two popular cooking appliances that have gained significant attention in recent years. While both offer convenience and unique cooking techniques, they have distinct differences that make them suitable for different cooking styles and preferences. Understanding the disparities between sous vide and the Instant Pot can help you make an informed decision about which appliance best suits your culinary needs.

The culinary world has witnessed the rise of various cooking methods and appliances that have revolutionized home cooking.

Two popular appliances that have gained significant attention are the sous vide machine and the Instant Pot.

While both appliances are designed to make cooking more convenient and efficient, they employ different techniques and offer distinct advantages.

In this article, we will delve into the differences between sous vide and the Instant Pot, highlighting their unique features and benefits.

Sous Vide Cooking

Sous vide, which translates to “under vacuum” in French, is a cooking method that involves vacuum-sealing food in a bag and cooking it in a temperature-controlled water bath.

The sous vide machine is specifically designed for this purpose and ensures precise temperature control throughout the cooking process.

The food is cooked at a low, consistent temperature for an extended period, resulting in tender, evenly cooked dishes.

Benefits of Sous Vide

Precise Temperature Control

One of the key advantages of sous vide cooking is the ability to maintain precise temperature control, which helps achieve consistent results. This is particularly useful for delicate proteins like fish or eggs, where even a slight variation in temperature can significantly impact the final outcome.

Enhanced Flavors and Texture

Sous vide cooking allows food to cook in its own juices, helping to retain moisture and enhance flavors. The extended cooking time also contributes to tenderizing meat, resulting in juicy and succulent dishes.

Convenience and Flexibility

Sous vide cooking offers the convenience of preparing meals in advance. Since the cooking time is not critical, you can leave the food in the water bath until you’re ready to serve.

Additionally, sous vide machines often come with accompanying apps that provide cooking guides and recipe ideas, making it easier for beginners to navigate the technique.

Instant Pot Cooking

The Instant Pot is a versatile multi-cooker that combines several kitchen appliances into one, including a pressure cooker, slow cooker, rice cooker, steamer, and more.

It uses pressure and heat to cook food quickly and efficiently. The Instant Pot has preset cooking programs for different types of dishes, making it a popular choice for busy households.

Benefits of Instant Pot

Time Efficiency

The Instant Pot’s main advantage is its ability to significantly reduce cooking time. The pressure cooking function increases the internal pressure, allowing food to cook faster. For example, dishes that typically require several hours in a slow cooker can be prepared in a fraction of the time using the Instant Pot.

Versatility and Convenience

The Instant Pot’s multiple cooking functions make it a versatile appliance that can replace several individual kitchen appliances. It can handle a wide range of recipes, from soups and stews to rice and yogurt. The convenience of having various cooking methods in one appliance makes it an attractive choice for those seeking versatility and space-saving solutions.

Set It and Forget It

Unlike sous vide cooking, where monitoring is required, the Instant Pot allows you to set the cooking time and leave it unattended. Once the cooking program is complete, the Instant Pot automatically switches to a keep-warm mode, ensuring your food stays ready to serve.

How to choose

While both sous vide and the Instant Pot offer convenient cooking solutions, they employ different techniques and provide unique benefits.

Sous vide excels in precise temperature control, resulting in consistently tender and flavorful dishes.

On the other hand, the Instant Pot prioritizes time efficiency and versatility, allowing you to prepare a variety of recipes quickly.

Choosing between the two ultimately depends on your cooking preferences, time constraints, and the specific dishes you wish to prepare.

Some cooks even choose to have both appliances to enjoy the benefits of both cooking methods.

April 7, 2023 Instant Pot Tips

How to Double A Recipe in the Instant Pot

Learning how to double recipes in your Instant Pot can be an absolute game-changer! Not only will it simplify meal prep and save you time, but it could also help stretch food budget dollars further. Keep reading as we break down exactly how to double any recipe in the Instant Pot

How to Double A Recipe in the Instant Pot

If you’re a parent of curious little mouths, it can be hard to keep up when the family is in need of a bigger dinner. Whether your kids love leftovers or you just want to make sure there’s enough for everyone – doubling your favourite recipes with an Instant Pot is the perfect way to prepare a delicious meal and have enough grub for the week.

So forget about the takeout menus – this post will show you how easy it can be to double your favourite recipes using an Instant Pot!

Doubling a recipe in the Instant Pot is a great way to make more food at once.

Here are some general tips to double a recipe:

Use a larger Instant Pot

If you plan to double a recipe, make sure your Instant Pot is large enough to accommodate the increased volume. Most Instant Pots are available in 6-quart or 8-quart sizes, so make sure to choose the right size for your needs.

Adjust cooking times

When you double a recipe, you may need to adjust the cooking time. Generally, increasing the cooking time by 5-10 minutes should be sufficient.

Be careful with liquid

When doubling a recipe, you may need to increase the amount of liquid slightly to ensure that there is enough liquid to build pressure and cook the food properly. However, be careful not to add too much liquid, as this can result in a watery dish.

Stir Well

When doubling a recipe, make sure to stir the ingredients well to ensure that everything is evenly distributed. This will help to prevent burning and ensure that the dish cooks properly.

Don’t overfill the Instant Pot

When doubling a recipe, make sure not to overfill the Instant Pot beyond the maximum fill line. Overfilling can result in the Instant Pot not building pressure properly and can also cause the food to burn.

Overall, doubling a recipe in the Instant Pot requires some adjustments to the cooking time and ingredient amounts, but it can be a great way to make more food at once.

Taking the time to follow these easy steps will help make doubling a recipe in your Instant Pot effortless and stress-free.

No more worries about breaking up your ingredients into smaller batches to prepare, or having too much food leftover- doubling recipes with the Instant Pot will take all of those worries away.

Share in the joy with friends and family by making double the amount you normally would, you can’t go wrong when meals are made more easily. Celebrate spending less time prepping and cooking meals while enjoying delicious results twice as fast. Happy cooking!

more recipes you may enjoy:

  • Easy Instant Pot Chicken, Potatoes, and Carrots
  • Chicken Tikka Masala
  • Instant Pot Honey Garlic Chicken
  • Instant Pot Chicken and Dumplings – Cracker Barrel Copycat Recipe

April 7, 2023 Instant Pot Tips

What’s the Best Size Instant Pot For a Family of Four

Instant Pots are a great way to make delicious, nutritious meals in minutes with minimal effort! But with all the different sizes available, what’s the best size Instant Pot for your family of four? We’ve got you covered with tips and tricks on choosing the right model.

what's the best size instant pot for a family of four

Choosing the best size Instant Pot for a family of four is a challenge, but with a little bit of research and consideration, it can be done.

In general, larger instant pots offer more features, are better for larger meals, and tend to last longer.

However, unless you are cooking big meals on a regular basis, it may be more economical to choose a smaller one.

Keep in mind that if you plan to use this appliance often, it may be worth investing in a bigger pot so you don’t run into space problems down the road.

What’s the best size of Instant Pot for a family of four

For a family of four, a 6-quart Instant Pot is generally a good size.

This size can easily cook enough food to feed a family of four, with some leftovers for another meal or two.

Here are some reasons why a 6-quart Instant Pot might be a good choice for a family of four:

Capacity

The 6-quart Instant Pot can hold up to 6 quarts of food, which is enough to cook a main dish and a side dish or two.

Versatility

The 6-quart Instant Pot can cook a wide variety of dishes, from soups and stews to rice and pasta dishes.

Space-saving

The 6-quart Instant Pot is compact enough to fit on most countertops, yet large enough to cook meals for a family of four.

Cost-effective:

The 6-quart Instant Pot is often less expensive than larger models, making it a more affordable option for families.

Of course, the best size Instant Pot for your family will depend on your specific cooking needs and preferences.

If you tend to cook larger meals or want more leftovers, you might consider a larger size, such as an 8-quart Instant Pot.

If you tend to cook smaller meals or have limited storage space, a 3-quart or 4-quart Instant Pot might be a better choice.

At the end of the day, make sure to consider your needs and how you plan to use your Instant Pot before making your final decision – it’ll certainly help set you up for success! Besides, with so many new sizes and capacities on the market—from 6-quarts all the way up to 12-quarts—you can always upgrade later if needed. No matter which size is right for you, an Instant Pot is a great investment that saves time and effort, so don’t be afraid of making the plunge!

Modern multi cooker in the kitche

April 7, 2023 Instant Pot Beef Recipes

How to Cook Frozen Meatballs in the Instant Pot

Cooking frozen meatballs in the Instant Pot could not be easier! The pressure cooker cuts cooking time tremendously and ensures your dish is cooked to perfection every single time. If you’re looking for a fun, fast and easy way to make dinner for your family, look no further – making deliciously tender meatballs in the Instant Pot has never been simpler.

how to cook frozen meatballs in the instant pot

Whether it’s game night with the kids or a low-key evening at home with just mom and dad around, this humble dish promises something for everyone: flavor, convenience, and maximum satisfaction guaranteed!

Cooking frozen meatballs in an Instant Pot is a quick and easy way to enjoy a delicious and satisfying meal.

Whether you’re making spaghetti and meatballs or meatball subs, the Instant Pot can help you get dinner on the table in no time.

In this blog post, we’ll go over the steps on how to cook frozen meatballs in the Instant Pot.

Basic Recipe for Frozen Meatballs in the Instant Pot

Ingredients:

  • 1 bag of frozen meatballs (about 1 pound)
  • 1 cup of beef broth*
  • 1 cup of your favorite tomato sauce**
  • 1 teaspoon of Italian seasoning
  • 1/2 teaspoon of garlic powder
  • Salt and pepper to taste

*May substitute for chicken or vegetable broth

**Sauce substitutions could include: Barbecue Sauce, Teriyaki Sauce, Spaghetti sauce OR put in all ingredients that your recipe calls for if making something with more steps.

Other combos we love:

  • Pineapple and peppers
  • Grape Jelly and Chili Sauce
  • Apricot Jelly

Instructions:

  1. Pour the beef broth and tomato sauce into the Instant Pot.
  2. Add the Italian seasoning, garlic powder, salt, and pepper, and stir to combine.
  3. Add the frozen meatballs to the Instant Pot, making sure they are fully submerged in the liquid.
  4. Close the lid of the Instant Pot and make sure the valve is set to “sealing.”
  5. Set the Instant Pot to “manual” or “pressure cook” mode and set the timer for 10 minutes.
  6. Once the timer goes off, let the pressure release naturally for 5-10 minutes.
  7. Carefully open the lid of the Instant Pot and stir the meatballs in the sauce.

What kind of frozen meatballs can you use?

You can use any type of frozen meatballs, such as beef, turkey, or chicken.

How to thicken your sauce

If you prefer a thicker sauce, you can mix 1 tablespoon of cornstarch with 1 tablespoon of cold water and add it to the Instant Pot after the meatballs are cooked. Cook for a few minutes on the sauté function until the sauce thickens.

How to add more flavor

If you want to add more flavor to the sauce, you can add diced onions, minced garlic, or chopped bell peppers to the Instant Pot before adding the meatballs.

What to do with leftovers

Leftover meatballs can be stored in an airtight container in the refrigerator for up to 3 days or in the freezer for up to 2 months.

Cooking frozen meatballs in the Instant Pot is a simple and convenient way to enjoy a delicious and hearty meal.

With just a few basic ingredients and a little bit of time, you can have a flavorful and satisfying dish that everyone will love.

So, grab your Instant Pot and get cooking!

Other articles you may enjoy:

  • Hawaiian Meatballs in the Instant Pot
  • Easy Instant Pot Butternut Squash Apple Soup Recipe
  • Instant Pot Beef Stew
how to cook meatballs in the instant pot

April 7, 2023 Instant Pot Beef Recipes

10 Easy Instant Pot Pot Luck Ideas

Instant Pots are great for potlucks because they allow you to cook large batches of food quickly and easily. Overall, the Instant Pot can be a great tool for potluck dinners, allowing you to cook and transport delicious and convenient dishes that everyone will love.

instant pot pot luck recipes

Why are Instant Pot recipes good for a Potluck?

Saves time: The Instant Pot can cook many dishes quickly and efficiently, which is great for potluck dinners where time is often limited.

Easy to transport: The Instant Pot’s removable inner pot and compact size make it easy to transport to and from potluck dinners.

Keeps food warm: The Instant Pot has a “keep warm” function that allows you to keep your dish at a safe temperature until it’s time to serve.

One-pot meals: The Instant Pot is great for making one-pot meals, such as chili or stew, which can be a convenient option for potluck dinners.

Large capacity: The Instant Pot comes in different sizes, some of which can hold up to 8 quarts of food, making it easy to cook enough food to feed a large group of people.

With all of the potential for simple yet extravagant meals that can be made in under 30 minutes, everyone will leave your potluck full and satisfied!

10 Instant Pot potluck recipe ideas

Chili

A hearty and flavorful chili is always a crowd-pleaser. You can make a classic beef chili or try a vegetarian version with beans and veggies.

Pulled Pork

Cook a large pork shoulder in the Instant Pot with BBQ sauce and spices for a delicious pulled pork dish that can be served on buns or as a main dish.

Mac and Cheese

Creamy and cheesy mac and cheese is a classic comfort food that’s perfect for potlucks. You can add bacon or other toppings to make it even more decadent.

Meatballs

Make a big batch of meatballs in the Instant Pot and serve them with your favorite sauce. They can be made with beef, turkey, or even vegetarian meat substitutes.

Hummus

Hummus is a fun dish to bring to a party or potluck because it is tasty and different- plus you can dip veggies, chips, bread or crackers in it so it is super versatille!

Corn Bread

Make a flavorful corn bread dish that is a perfect side for any BBQ or party!

Chicken Noodle Soup

Use the Instant Pot to make a hearty and healthy vegetable soup with plenty of seasonal veggies, herbs, and spices.

Baked Beans

Slow-cooked baked beans are a classic potluck dish, but you can speed up the process with the Instant Pot. Use canned or dry beans and add your favorite seasonings and meat.

Mashed Potatoes

Make creamy and fluffy mashed potatoes in the Instant Pot for an easy side dish that everyone will love.

Cheesecake

Yes, you can even make desserts in the Instant Pot! Try making a rich and creamy cheesecake for a sweet treat that will impress everyone at the potluck.

All in all, Instant Pot dishes are a great way to make a tried and true potluck dish quickly and easily. With its portability and ease of cleanup, it’s the perfect option for feeding a crowd. Put these tips to use to make your next potluck gathering an instant success!

other instant pot side dishes:

  • Easy Instant Pot Baked Beans
  • Instant Pot Hamburger Helper
  • Instant Pot Macaroni and Cheese with Bacon

April 7, 2023 Instant Pot Beef Recipes

How to Cook Ground Beef in the Instant Pot

Cooking beef in the Instant Pot is easy and quick- anyone can do it. Keep reading for simple instructions on how to cook beef in the Instant Pot.

how to cook ground beef in the instant pot

Cooking ground beef in the Instant Pot is a quick and easy way to make delicious meals.

Ground beef in the Instant Pot is a convenient and quick way to make delicious meals, especially for busy weeknights.

Cooking ground beef in the Instant Pot has a few advantages:

Speed: Cooking ground beef in the Instant Pot is much faster than cooking it on the stovetop. The Instant Pot’s high pressure cooking function can cook the meat in a fraction of the time it would take to cook it on the stove

Convenience: Cooking ground beef in the Instant Pot is a hands-off process, which means you can prep other ingredients or work on other parts of the meal while the beef cooks.

Flavor: The high pressure cooking process in the Instant Pot can help to lock in flavor and moisture, resulting in more flavorful and tender beef.

Easy clean-up: Cooking ground beef in the Instant Pot means there’s only one pot to clean, which can be a time-saver and make clean-up easier

How to cook ground beef in your Instant Pot

Ingredients:

  • 1 pound ground beef
  • 1 tablespoon cooking oil (such as vegetable or canola oil)
  • 1 teaspoon salt
  • 1/2 teaspoon black pepper
  • 1/2 teaspoon garlic powder
  • 1/2 teaspoon onion powder (optional)

Instructions:

  1. Turn on your Instant Pot and select the “Sauté” function.
  2. Once the Instant Pot is heated up, add the cooking oil.
  3. Add the ground beef to the Instant Pot and use a wooden spoon to break it up into small pieces.
  4. Add the salt, black pepper, garlic powder, and onion powder (if using) to the Instant Pot and stir to combine.
  5. Cook the ground beef for about 5-7 minutes, or until it is browned and cooked through, stirring occasionally.
  6. Once the ground beef is cooked, turn off the Instant Pot and use a slotted spoon to remove the beef from the pot. Discard any excess fat.
  7. Use the cooked ground beef in your favorite recipe, such as tacos, spaghetti sauce, or chili.

How do I know if my ground beef is cooked?

It is important to make sure the ground beef is fully cooked before consuming to avoid the risk of foodborne illness.

The internal temperature of the cooked ground beef should reach 160°F (71°C).

more recipes you might enjoy:

  • Instant Pot Turkey Breast
  • Instant Pot Pot Roast
  • Instant Pot Chicken Alfredo
how to cook ground beef in the instant pot

April 7, 2023 Instant Pot Soups

How Do You Reheat Soup in the Instant Pot?

Let’s dive right into all of the tips and tricks for how to use your Instant Pot to reheat soup correctly so you can get back on track for those busy weeknights. The Instant Pot is not only a time saver—it can help you create hot, delicious dishes with almost no effort!

If you own an Instant Pot you may have some questions when it comes to using it.

One of those questions may be- can you reheat soup in the Instant Pot? And the answer is simple.

Yes, you can definitely reheat soup in an Instant Pot.

The Instant Pot is a versatile kitchen appliance that can be used for cooking, sautéing, pressure cooking, and reheating food, including soup.

Reheating soup in an Instant Pot is convenient because it allows you to heat the soup evenly, without the risk of burning or scorching, and it can be done quickly.

Just be sure to follow the instructions for reheating soup in an Instant Pot, as cooking time and pressure may vary depending on the type of soup and the amount you are reheating.

How Do You Reheat Soup in the Instant Pot?

To reheat soup in an Instant Pot, you can follow these steps:

  1. Place the soup in the Instant Pot: First, pour the soup into the Instant Pot inner pot.
  2. Add some liquid: If the soup is thick or has a tendency to stick to the bottom of the pot, you may want to add some liquid such as water or broth to the pot.
  3. Close the lid: Ensure that the Instant Pot lid is securely in place, and the valve is set to the “Sealing” position.
  4. Select the “Soup” function: Press the “Soup” function button and set the cooking time to 2-3 minutes.
  5. Wait for the Instant Pot to heat up: The Instant Pot will take some time to come to pressure before it starts cooking. Once the pressure has been reached, the cooking time will begin.
  6. Quick release the pressure: Once the cooking time is up, quick release the pressure by carefully turning the pressure release valve to the “Venting” position. Be sure to keep your hands and face away from the steam.
  7. Stir and serve: Once the pressure has been released, open the lid and stir the soup. Serve and enjoy!

Cooking time may vary depending on the quantity and type of soup you are reheating. Adjust the cooking time accordingly.

Also, be careful when handling the hot soup and the Instant Pot.

Reheating soup in the Instant Pot is an uncomplicated yet effective way to enjoy your favorite recipes at their peak flavor. Not only is it simple and speedy, but utilizing an Instant Pot also keeps the additional mess of reheating food on the stovetop or in a microwave to a minimum.

more instant pot dinners ideas:

  • Chicken Tikka Masala
  • Instant Pot Honey Garlic Chicken
  • Easy Instant Pot Steak Fajitas Recipe
  • Instant Pot Chicken Alfredo
  • Extra Cheesy Instant Pot Lasagna
  • Instant Pot Ham Potato and Cheddar Soup
How Do You Reheat Soup in the Instant Pot?
  • Page 1
  • Page 2
  • Page 3
  • Interim pages omitted …
  • Page 8
  • Go to Next Page »

Copyright © 2024 · whatsinthepot.com. Privacy Policy.