• Skip to primary navigation
  • Skip to main content
  • Instant Pot Recipes
    • Instant Pot Main Dish
    • Instant Pot Side Dish
    • Instant Pot Drinks
    • Instant Pot Soups
    • Instant Pot Breakfast Recipes
    • Instant Pot Drinks
    • Instant Pot Dessert Recipes
  • Contact

What's in the Pot logo

You are here: Home / Blog

Blog

September 7, 2022 Uncategorized

How To Deglaze An Instant Pot: A Simple Guide

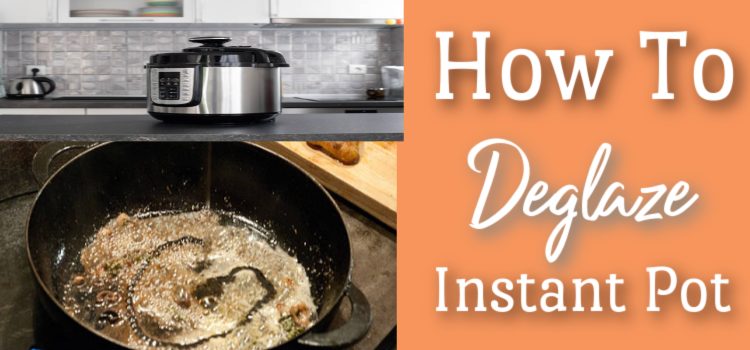
If you’ve ever used an Instant Pot, you know that one of the best things about it is how easy it is to make dinner. But sometimes if you’re not familiar with all the Instant Pot lingo it may be confusing. One term you may have come across but not fully understood is “deglaze.” So what does it mean? Keep reading for all the answers!

how to deglaze instant pot

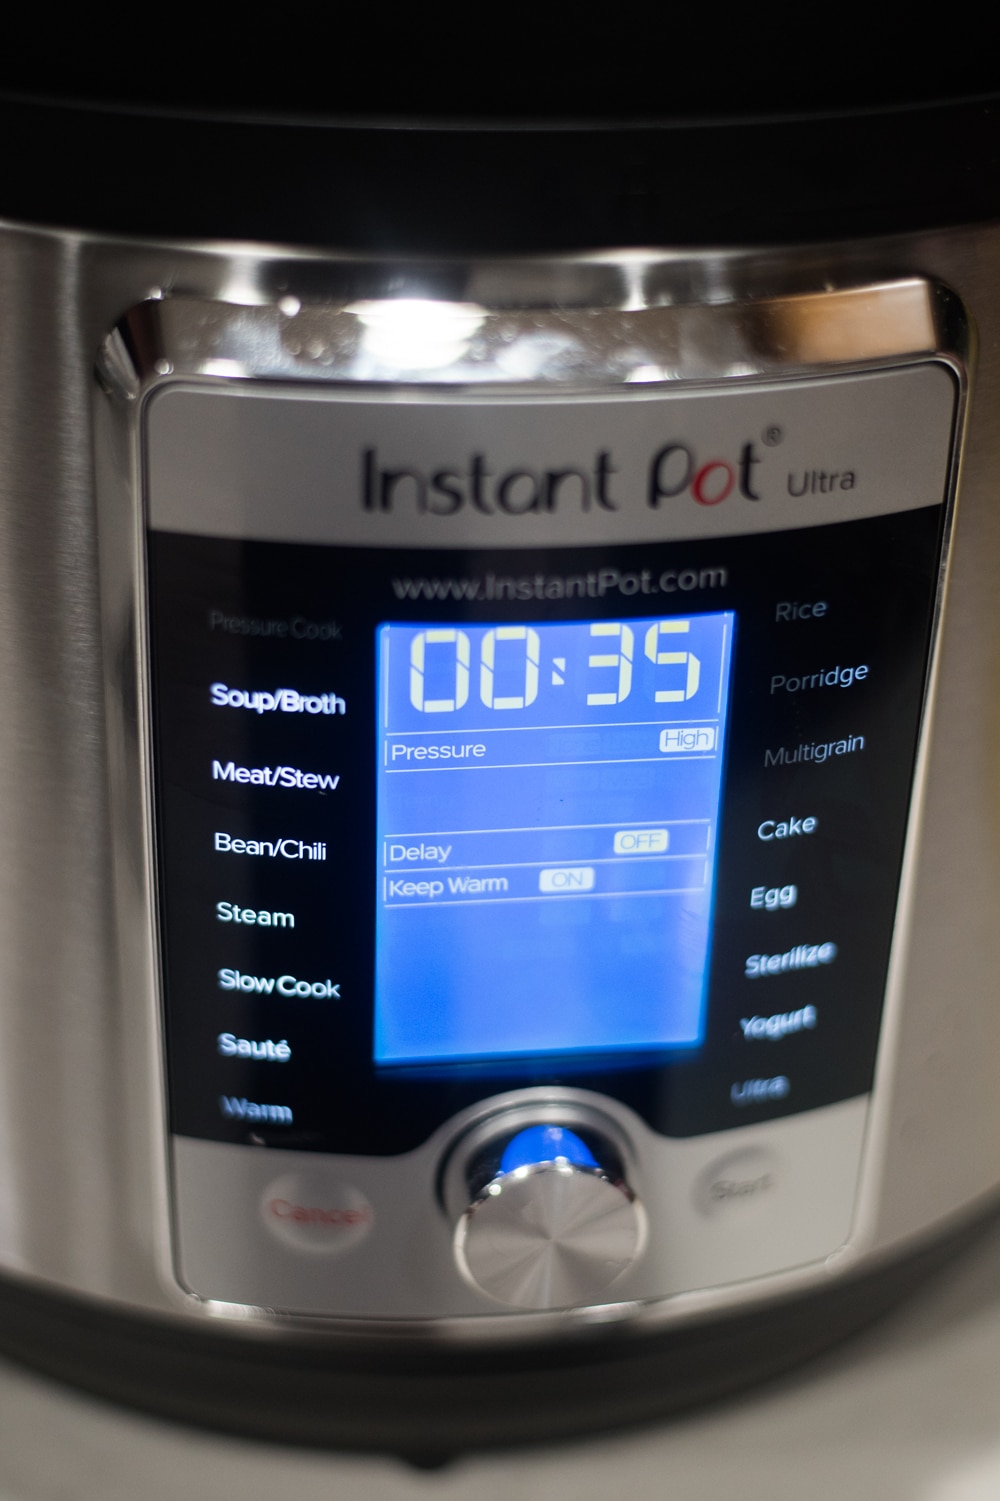
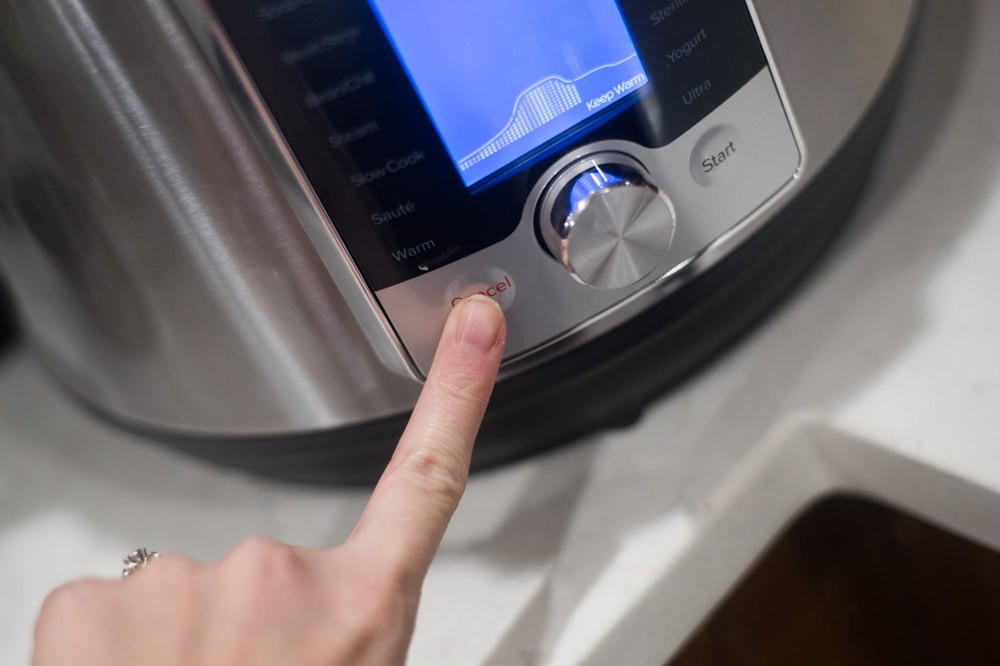
If you’re new to the Instant Pot, or even if you are a novice you might have experienced having that blasted “burn” warning pop up on your pot while making dinner.

One common reason for the BURN message to pop is that your pot needs to be “deglazed” which is a relatively quick and easy fix!

What does it mean to deglaze?

You may be wondering what “deglazing” means.

Essentially, deglazing is a process of removing any browned bits from the bottom of your pot after cooking something. This is important because those bits can create a bitter flavor in your food and cause your Instant Pot to relay the BURN message.

deglazing a pan

When should you deglaze your Instant Pot?

You will want to deglaze your pot primarily after using the “saute” or “sear” function on your pot. Those functions cause food to get super hot- which can in turn cause food to burn off and stick to the bottom of your food.

To avoid this, you can always sear or saute your food in a pan on the stove top. But it is totally doable in your Instant Pot, too!

What happens if you don’t deglaze your Instant Pot?

If you neglect to deglaze your Instant Pot it can trigger the BURN notice on your pot due to the stuck on pieces of food.

How to deglaze your Instant Pot

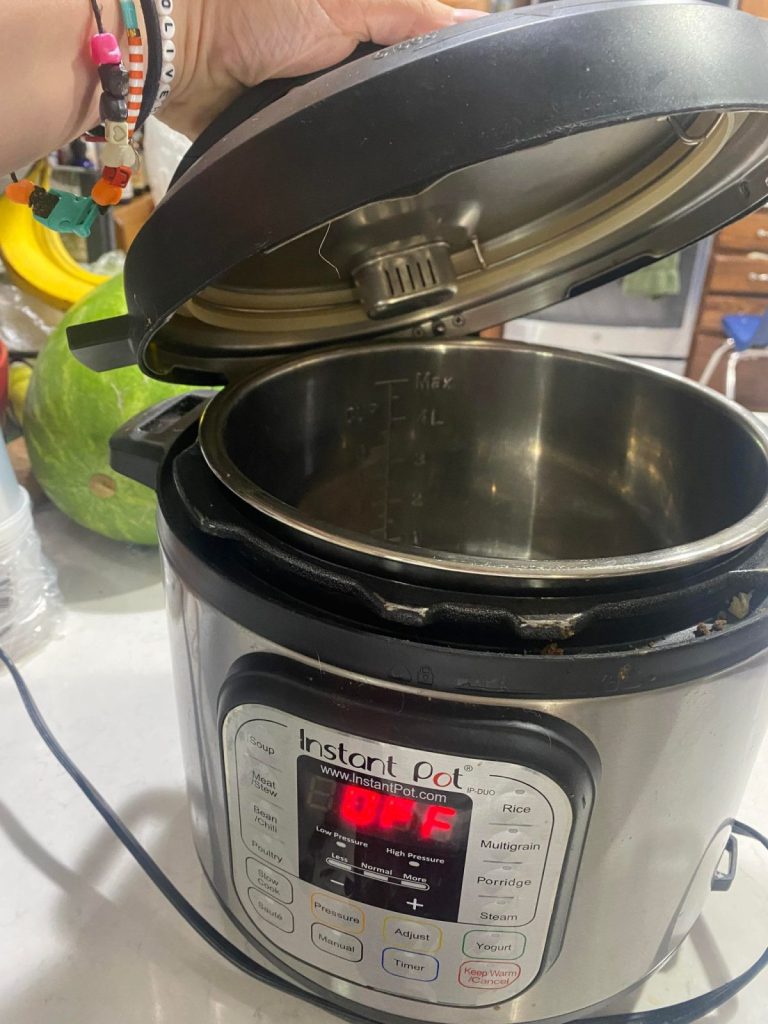
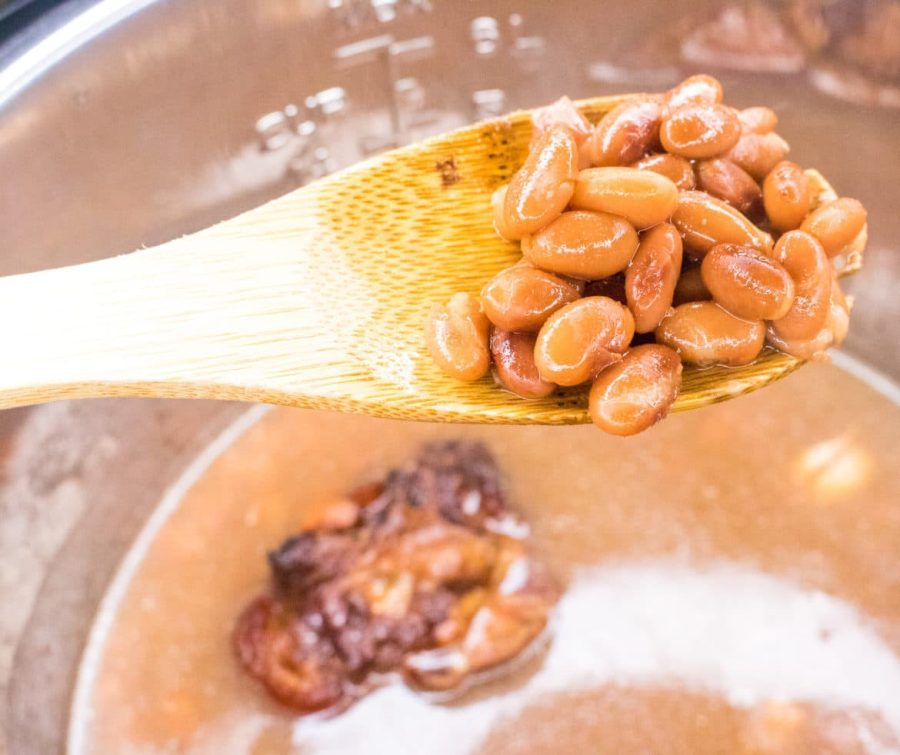
  1. The first step in deglazing your Instant Pot is to turn your Instant Pot off to help it cool down quicker and then remove the food that is stuck to the bottom of the pot. You can do this by using a spoon or a spatula.
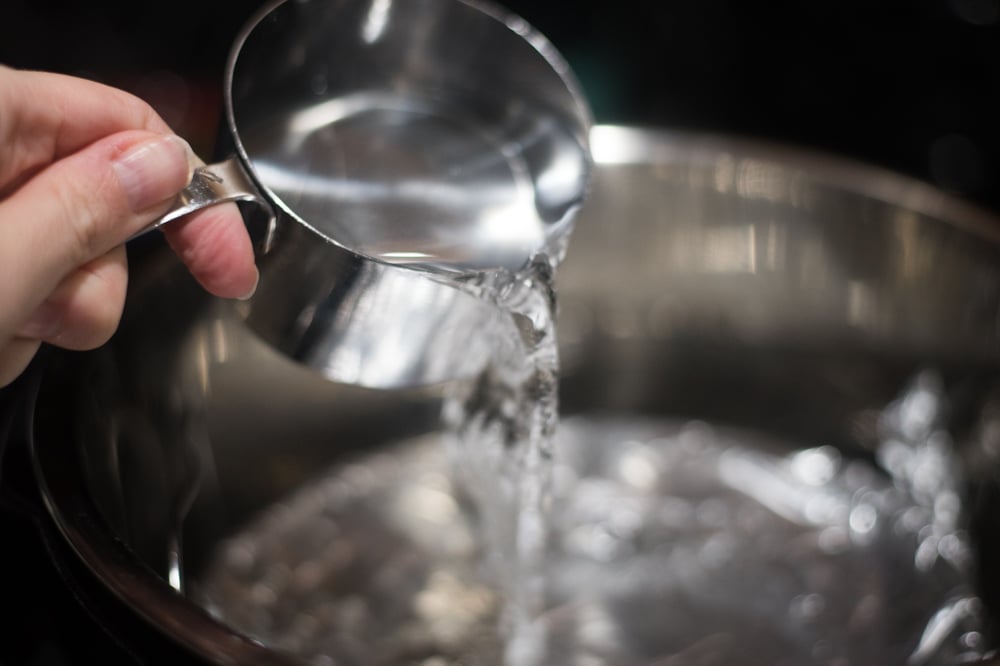
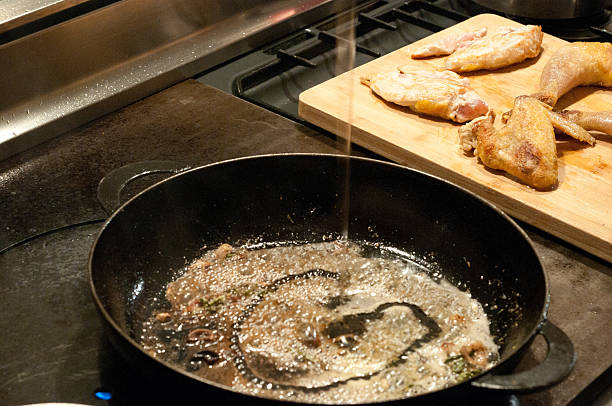
  2. Once you have removed the food, you will need to add some liquid to the pot. The most common liquids that are used for deglazing are water, broth, or wine. Using wine or broth can give an added richness and flavor to your dish. Check your recipe and if it calls for broth you can include some of the called for broth in this step
  3. Scrape the bottom of the pot with a wooden spoon or spatula.
  4. Continue cooking your meal. Post people do this when cooking meats such as pork or roast because you will need to sear the meat first and then add additional ingredients.

more articles you may enjoy:

  • How Long Does An Instant Pot Take To Preheat?
  • Easy Instant Pot Butternut Squash Apple Soup Recipe
  • Easy Instant Pot Tomato Soup Recipe
how to deglaze an instant pot

September 5, 2022 Uncategorized

How To Proof Bread In Your Instant Pot

What if you don’t have time to wait for dough to rise? That’s where the instant pot comes in! In this article, we will walk you through how to proof bread in an instant pot.

how to proof bread in the instant pot

Is there anything the Instant Pot can’t do? It certainly doesn’t seem so! We are always learning new tips and techniques that can be done in the Instant Pot.

One of those is the ability to proof homemade bread!

It is a fairly simple process but if you have never done it and are wondering how it all works, be sure to keep reading to learn everything you need to know.

How to proof the bread in your Instant Pot:

What materials are needed:

  • An Instant Pot with a “yogurt” setting
  • Bread dough
  • Parchment paper for the inside of your pot (you can also line your pot with olive oil if you prefer)
  • A lid to place lightly on top. The IP is not recommended to use as it creates more of a tight seal. You can also use aluminum foil instead of a lid.

How to do it:

  • Instant Pot with a “yogurt setting”
  • Bread dough
  • parchment paper to prevent sticking (can help with lifting the bread out afterward) or you may use olive oil
  • Lid (using a lid other than the IP lid is recommended to avoid the dough sticking to the top of it if it rises to quickly- you do not want to create a tight seal. Aluminum foil or a glass lid is sufficient).

Steps:

  1. Line your Instant Pot with parchment paper or brush the inside with olive oil
  2. Place your dough in the Instant Pot forming it into a ball
  3. Put your lid or aluminum foil on top lightly- do not create a seal
  4. Press the “yogurt” setting on your Instant Pot
  5. Select the “less” or “low” setting
  6. Set timer for 30 minutes. If the dough has doubled in size it is finished. If not, check on it every ten minutes or so until it’s finished.

What does it mean to proof bread?

bread dough

In the baking world, proofing is the process of allowing dough to rise.

This is an important step in breadmaking, as it allows the yeast to work its magic and produce a light, fluffy loaf of bread.

This is often done in a warm place so that the yeast can work its magic and create those delicious bubbles of air. If you’ve ever made bread before, then you know that the dough needs to rise in order for it to be fluffy and light.

Why proof bread in an Instant Pot?

loaf of bread

This can be done in a number of ways, but one of the most popular methods is to use an instant pot.

One of the great things about proofing bread in an instant pot is that it speeds up the process. In a traditional oven, it can take a couple of hours for bread to double in size. With an instant pot, you can achieve the same results in a fraction of the time.

Another benefit of proofing bread in an instant pot is that it creates a warm, humid environment – perfect for the dough to rise. This is because the instant pot traps steam inside, which keeps the bread moist as it rises.

You can also set it and walk away without worry knowing it is speeding up the process so you can continue your bread making!

Can any type of bread be proofed in an Instant Pot?

Almost any bread recipe can be adapted for the instant pot. This includes recipes for sandwich bread, pizza dough, rolls, and more. Just remember to adjust the cook time accordingly – most recipes will only need to rise for 30 minutes or so in the instant pot.

We hope that this was helpful! Be sure to let us know if you have any questions about proofing bread in your Instant Pot!

more articles you may enjoy:

  • How Long Does An Instant Pot Take To Preheat?
  • Easy Instant Pot Butternut Squash Apple Soup Recipe
  • Easy Instant Pot Tomato Soup Recipe
instant pot cauliflower

September 3, 2022 Instant Pot Side Dish

Easy Instant Pot Mashed Cauliflower Recipe

These keto friendly cauliflower mashed potatoes are so good you won’t even miss the traditional mashed potatoes. Made in your instant pot they are a fast and easy side dish that will become a family favorite in no time!

Easy Instant Pot Mashed Cauliflower Recipe

I use my instant pot whenever possible.

Mashed cauliflower is a great side dish for any type of meal, and it’s especially good if you’re looking for something healthier than traditional mashed potatoes.

This easy Instant Pot mashed cauliflower recipe is simple to make and doesn’t require any fancy ingredients.

Plus, the Instant Pot makes it quick and easy to cook your cauliflower perfectly every time. So give this recipe a try next time you’re looking for a side dish that will impress your guests!

Ingredients

  • 3 cups cauliflower florets
  • 1/3 cup half and half
  • 1/4 cup butter
  • salt
  • pepper
  • garlic powder

Instructions

  1. Add one cup of water to the bottom of Instant Pot.
  2. Place 3 cups of cauliflower florets into an Instant Pot steamer basket.
  3. Place lid on Instant Pot.
  4. Set Instant Pot to manual high pressure for 1 minute.
  5. Once the timer goes off, quick pressure release all the pressure.
  6. Take the basket out of the Instant Pot. Pour water out.
  7. Put cauliflower into the pot of the Instant Pot.
  8. Mash with a potato masher. For a smoother consistency, use a hand mixer.
  9. Add half and half and butter and mash until desired consistency.
  10. Add salt, pepper, and garlic powder to taste.

What can I serve with this?

You can serve the same dishes you might serve with regular ol’ mashed potatoes.

Get creative or stay traditional with different meats and veggies. Meatloaf would be amazing with these as would veggies like corn, peas, carrot or asparagus.

Because this is the perfect low carb side dish you can feel a little less guilt when it comes to the main dish.

If you are in need of some inspiration here are a few of our favorite recipes that would pair nicely with them.

  • How to Make Microwave Corn on the Cob
  • Potato Chip Casserole
  • BBQ Chicken
  • Air Fryer BBQ Chicken Wings
  • Leftover Rotisserie Chicken Recipes
  • Easy Apricot Chicken
  • Instant Pot Turkey Breast
  • Orange Glazed Turkey
  • Buffalo Meatloaf
Instant Pot Cauliflower Mash

Substitutions

Mashed cauliflower is best when fresh cauliflower is used. However, you can use frozen just know that it might make the consistency more mushy.

Using half and half is the magic ingredient to make these rich and creamy but you could use milk instead.

If you don’t have a potato masher or a hand mixer to mash the cauliflower you can use a food processor, wooden spoon or a large cup to mash it with.

What kind of butter should I use?

I prefer unsalted so you can control how much salt goes into it.

Can I add different spices beside garlic powder?

Yes! Add whatever you think would taste good.

Can I double this recipe?

Yes!

How do I reheat cauliflower mash?

Reheat on low and add a little more butter to the mixture. Heat until warmed.

How long does cauliflower mashed potatoes last in the fridge?

They can last up to five days in an airtight container.

Can I make cauliflower mashed potatoes ahead of time?

Yes. I would recommend serve within 3 days of making them.

Does cauliflower cause gas?

It is possible. Cruciferous veggies, such as broccoli and cauliflower, contain complex sugars that are hard to digest which can cause symptoms of indigestion — bloating and gas.

Easy Instant Pot Mashed CAULIFLOWER RECIPE

Easy Instant Pot Mashed CAULIFLOWER RECIPE

Yield: 6
Prep Time: 5 minutes
Cook Time: 5 minutes
Total Time: 5 minutes

These keto friendly cauliflower mashed potatoes are so good you won’t even miss the traditional mashed potatoes. Made in your instant pot they are a fast and easy side dish that will become a family favorite in no time!

Ingredients

  • 3 cups cauliflower florets
  • 1/3 cup half and half
  • 1/4 cup butter
  • tap here
  • salt
  • tap here
  • pepper
  • garlic powder

Instructions

  1. Add one cup of water to the bottom of Instant Pot.
  2. Place 3 cups of cauliflower florets into an Instant Pot steamer basket.
  3. Place lid on Instant Pot.
  4. Set Instant Pot to manual high pressure for 1 minute.
  5. Once the timer goes off, quick pressure release all the pressure
  6. Take the basket out of the Instant Pot. Pour water out.
  7. Put cauliflower into the pot of the Instant Pot.
  8. Mash with a potato masher. For a smoother consistency, use a hand mixer.
  9. Add half and half and butter and mash until desired consistency.
  10. Add salt, pepper, and garlic powder to taste.
Nutrition Information:
Yield: 6 Serving Size: 1
Amount Per Serving: Calories: 101Total Fat: 9gSaturated Fat: 6gTrans Fat: 0gUnsaturated Fat: 3gCholesterol: 25mgSodium: 176mgCarbohydrates: 4gFiber: 2gSugar: 2gProtein: 2g
© Katie Clark
Cuisine: American / Category: Instant Pot Side Dish

More recipes you may enjoy:

  • Instant Pot Turkey Stock
  • Instant Pot Pozole
  • Instant Pot Pot Roast

The Instant Pot is a fantastic kitchen appliance that can help you make quick and easy meals. This mashed cauliflower recipe is a great example of how the Instant Pot can be used to create a healthy and delicious dish. If you’re looking for an easy way to get started with using an Instant Pot, this recipe is a great option. Give it a try and let us know how it turns out!

instant pot apple sauce

September 1, 2022 Instant Pot Fruit Recipes

Easy Instant Pot Applesauce – Only 5 Ingredients!

Making applesauce has never been easier than with the Instant Pot! This Instant Pot Applesauce recipe is easy, delicious and has only 1 tablespoon of added sugar. It’s super flavorful and can easily be canned for later.

bowl of instant pot with cinnamon stick

Making your own applesauce is so much easier than you might think, and with an Instant Pot, it’s practically foolproof!

This recipe only requires five simple ingredients and takes just minutes to make. Plus, it’s a great way to use up any leftover apples.

Give it a try today!

Ingredients

granny smith apple
  • 8 apples, a mix of Granny Smith, and Fuji, Braeburn, or Gala
  • 2/3 cup water
  • 1 tablespoon sugar, brown sugar, or honey
  • 1 tablespoon lemon juice, optional
  • 1 teaspoon cinnamon, optional, or nutmeg, vanilla, cloves, or ginger, to taste

Instructions

apple sauce in a ramekin
  1. Take eight apples, a blend of apples or one that holds up being cooked.
  2. Peel them if you want, and core and chop into large chunks.
  3. Add to Instant Pot, along with at least 1/2 cup water.
  4. Set to pressure cook for 5 minutes, high pressure.
  5. Let the apples do a natural release for 10 minutes, then finish releasing the pressure.
  6. Mash the apples with a potato peeler, or use an immersion blender.
  7. Be careful not to splash the applesauce, as it’s very hot! A
  8. dd any sugar, lemon, or spices, and it’s done!
  9. This recipe makes about 4 1/2 to 5 cups of applesauce.

Why make homemade applesauce?

This recipe works because it’s easy, fast and tastes far better than what comes from the store.

You know where it came from and what’s in it, and you can modify it to make every mouth happy.

You can make it plain or sweet, or jazz it up with cinnamon, cloves, nutmeg, or whatever you crave.

chopped apples

What kind of apples should I use?

You can really use any apples you have on hand.

Most conventionally available apples have a good flavor and texture that hold up while cooking.

If you’re making a quick batch on a Tuesday afternoon, just use what’s on hand. If you’re planning ahead, it’s better to use a blend of apples to maximize both flavor and texture.

red and green apples

Apples that have the best flavor for cooking, like Granny Smith, are a little soft and grainy once cooked.

Gala, Fuji, and Braeburn have good flavor and texture but have less flavor cooked. Mixing the tart Granny Smith with a milder but sturdier apple provides the perfect combination of flavor and texture.

Steer clear of Golden Delicious and Red Delicious. Their flavor profile is so mild and they are so soft, they will not make the best applesauce.

The bottom line is, use what you can get from the store. Aim for a blend of roughly equal parts Granny Smith and a red apple such as Gala, Fuji, Braeburn or something else with great flavor.

Do I have to peel my apples?

Peeling is not at all required.

If you peel, it takes more time up front but is faster to blend.

A simple veggie peeler will do a great job.

Go either in circles around the fruit or up and down in strips. Peeling, coring and chunking eight apples takes about ten minutes.

peeled apples

If you don’t peel, it’s faster getting in the pot, but you should be sure to blend the cooked thoroughly to avoid having any chunky peels in the smooth applesauce.

If you do leave the peels on, consider avoiding Granny Smith apples, as their peels are thicker and harder to blend completely.

Generally, I’m not swayed to buy organic fruit, but if you’re going to make applesauce and keep the peels on, consider buying organic fruit.

Apple peels have more chemicals than most fruits, and apples are given an additional wax before being sold to make them stay fresh longer.

This wax is safe to eat, but it doesn’t hurt to peel it off or buy something uncoated.

apple sauce in jar with apples
Instant Pot Apple Sauce

Instant Pot Apple Sauce

Yield: 5 cups
Prep Time: 15 minutes
Cook Time: 25 minutes
Total Time: 40 minutes

Making applesauce has never been easier than with the Instant Pot! This Instant Pot Applesauce recipe is easy, delicious and has only 1 tablespoon of added sugar. It’s super flavorful and can easily be canned for later.

Ingredients

  • 8 apples, a mix of Granny Smith, and Fuji, Braeburn, or Gala
  • tap here
  • 2/3 cup water
  • 1 tablespoon sugar, brown sugar, or honey
  • 1 tablespoon lemon juice, optional
  • 1 teaspoon cinnamon, optional, or nutmeg, vanilla, cloves, or ginger, to taste

Instructions

  1. Take eight apples, a blend of apples or one that holds up being cooked.
  2. Peel them if you want, and core and chop into large chunks.
  3. Add to Instant Pot, along with at least 1/2 cup water.
  4. Set to pressure cook for 5 minutes, high pressure.
  5. Let the apples do a natural release for 10 minutes, then finish releasing the pressure.
  6. Mash the apples with a potato peeler, or use an immersion blender.
  7. Be careful not to splash the applesauce, as it’s very hot! A
  8. Add any sugar, lemon, or spices, and it’s done!
  9. This recipe makes about 4 1/2 to 5 cups of applesauce.
© CindyM
Cuisine: American / Category: Easy Side Dishes

Why do I need water and lemon juice?

Recipes vary in the amount of water and lemon juice.

I recommend using at least half a cup of water until you know your Instant Pot and your apples.

While apples are a high-water food, they don’t release enough water fast enough in the cooking process to not trigger the awful BURN alarm the Instant Pot sounds when it senses a lack of water.

If you really want it thick, add less water and hope it doesn’t scorch.

Lemon juice is added as a natural preservative, both against the common yellowing of apples, and to extend freshness in the fridge a few days.

I also like a little lemon juice because it enhances and compliments the sweetness of the apples. It is optional, and I only add it after cooking, if I think the flavor is a little flat.

What About Sugar?

apple sauce being blended

If you do want to add sugar, or any other flavor, do not add it until after the apples are cooked and blended.

If you add sugar to the cooking apples, it increases the chance they will burn, and increases the foam. It can make a sticky mess. Add the sugar by the small spoonful. You’ll find it only needs a little to make it perfect and you don’t want to overdo it.

What other flavors can I add?

Applesauce tastes great without any additions, but it’s fun to mix it up with a little flavor.

Cinnamon is my go-to. I love cinnamon and always add a lot to my recipes, but here I find a teaspoon will go a long way. Nutmeg, vanilla, cloves, and even ginger are great.

When you’re adding sugar or another flavor, it’s best to put a little applesauce on a plate to cool for a minute before tasting and flavoring.

It’s hard to actually taste the flavor of applesauce when it’s really hot, so you might not get an accurate sense of what it will taste like when you serve it.

Other Recipes You May Enjoy:

  • Instant Pot Tuxedo Hot Chocolate
  • Instant Pot Banana Cake
  • Instant Pot Mac and Cheese with Bacon

Applesauce is one of those recipes that’s more an assembly than anything else, and this Instant Pot applesauce is no different. With only five ingredients and a few minutes in the pressure cooker, you can have homemade applesauce on the table faster than it would take to open a jar of store-bought sauce. So why not give it a try? We think you’ll be surprised at how delicious (and easy!) this recipe is.

instant pot applesauce
instant pot quinoa

August 30, 2022 Instant Pot Side Dish

Easy Instant Pot Quinoa

Instant Pot Quinoa is a quick and easy way to prepare this ancient grain. It’s a great side dish that makes for a great addition to any meal!

Does the mention of quinoa conjure up an image of a complicated, time-consuming dish? If so, think again! This quick and easy Instant Pot quinoa proves that this superfood can be simple to prepare. And thanks to the Instant Pot’s pressure cooking function, it cooks up in just minutes.

So whether you’re looking for a healthy weeknight meal or a hearty side dish, this quinoa is sure to hit the spot.

Quinoa (pronounced keen-wa) is an ancient food that has recently become popular in the United States because it is basically a superfood.

It is high in protein and fiber, has all nine essential amino acids, and has vitamin B and many other critical vitamins. And it is incredibly tasty!

Ingredients

Getting started could not be easier, all you need is two ingredients! This recipe is for a natural release, but you can easily do a quick release. I’ve provided more info at the bottom of the post. This recipe will provide a side dish serving for four people.

  • 1 cup quinoa, rinsed
  • 1 1/4 cup chicken broth or bouillon

Instructions

  1. Rinse 1 cup quinoa under the sink
  2. Add quinoa to the Instant Pot
  3. Add 1 1/4 cups chicken broth
  4. Seal lid and valve, set Instant Pot to cook for one minute on high pressure
  5. When done cooking, allow for a ten-minute natural release before venting
instant pot quinoa in bowl

How to Make Quinoa in the Instant Pot

Quinoa is healthy, popular, and versatile. Using the Instant Pot for quinoa is great because it actually tastes better than stove top quinoa: it’s fluffier, doesn’t burn on the bottom and is cooked evenly throughout.

You can make this so many ways, it’ll become your go-to side dish! It is as easy to make as rice; simply measure, rinse, pop ingredients into the Instant Pot and set the timer.

How long to cook Quinoa in the Instant Pot?

There are actually two equally effective ways of cooking quinoa in the Instant Pot. If you’re a fan of the natural release, set the pressure cooker for one minute and allow ten minutes for the natural release.

If you’re in a hurry or prefer quick release, cook it for five minutes and then do the quick release. There’s a slight difference in the water content, so I note that at the end of the post. (You need a little more water for a quick release than natural.)

What kind of quinoa should I buy?

There are lots of brands and types, from red, white, and black quinoa, to blends with multiple colors.

If you’re new to quinoa, feel free to grab the rainbow blend. It’s incredibly versatile and very pretty. But you can’t go wrong with any of the three on their own, so don’t worry, just buy what is available!

Should I rinse the quinoa?

Yes! Like with rice, rinsing the quinoa is an essential step. It removes the saponin, a coating that will leave your quinoa tasting soapy and bitter. Rinsing it will also make it less clumpy and fluffier.

What flavors go best with quinoa?

In this recipe, I use chicken broth to add a little extra flavor, but using water is fine. As it cooks, it will absorb whatever flavor you add, making it a complimentary side for many dishes.

I like savory spices, like garlic, cumin, and chili powder, and I love to garnish it with a scoop of salsa, or cilantro or flat leaf parsley to add color and hint of freshness.

Quinoa is similar to rice in its versatility, but it does have a slight crunch which is really appealing. It goes well with a traditional meat like chicken or pork, or is a great on a vegetarian menu because of its high protein content.

quinoa on a spoon

Quick and Easy Instant Pot Quinoa

Quick and Easy Instant Pot Quinoa

Yield: 2 cups
Prep Time: 5 minutes
Cook Time: 15 minutes
Total Time: 20 minutes

Instant Pot Quinoa is a quick and easy way to prepare this ancient grain. It’s a great side dish that makes for a great addition to any meal!

Ingredients

  • 1 cup quinoa, rinsed
  • 1 1/4 cup chicken broth or bouillon

Instructions

Rinse 1 cup quinoa under the sink

Add quinoa to the Instant Pot

Add 1 1/4 cups chicken broth

Seal lid and valve, set Instant Pot to cook for one minute on high pressure

Nutrition Information:
Yield: 6 Serving Size: 1
Amount Per Serving: Calories: 41Total Fat: 1gSaturated Fat: 0gTrans Fat: 0gUnsaturated Fat: 1gCholesterol: 1mgSodium: 274mgCarbohydrates: 7gFiber: 1gSugar: 1gProtein: 2g
© Katie Clark
Cuisine: American / Category: Instant Pot Side Dish

Natural Release vs. Quick Release

After having done this both ways many times, I think natural release is slightly fluffier and has better water absorption, but the quick release is still so good and saves five minutes, it’s definitely a good option.

The only thing is you need to increase your liquid content to account for the moisture lost in the quick release. Instead of 1:1.25, use 1:1.5; so for every cup of quinoa use 1 1/2 cups liquid. Then, set the pressure cooker to high for five minutes, and then do the careful quick release, and enjoy!

What does Quinoa Go Well With?

Quinoa can be served for a variety of dishes and for just about every meal of the day.

It’s a wonderful replacement for rice – so anything that you serve with rice you could easily serve with quinoa instead. It can be served with kale or spinach, and you can easily add some additional ingredients to make it a heartier meal. It can be especially tasty with sweet potatoes.

I’ve had a very delightful breakfast that had quinoa, sweet potatoes, sausage, and eggs. It was very hearty and filling!

Is Quinoa Better for You than Rice?

Quinoa and rice are pretty similar in texture and cooking method, however, they have very different nutritional profiles. Quinoa is actually more similar to leafy vegetables!

It is a complete protein with nine essential amino acids. Pretty impressive! Quinoa has much more fiber, few carbs and fewer calories than white.

There are some varieties of rice that will be better on the nutrition scale, but when comparing quinoa to white rice, quinoa is more nutritionally superior.

Other Instant Pot Side Dishes

  • psInstant Pot Beef Stew
  • Instant Pot Hummus
  • Instant Pot Green Beans

And that’s it! You now have a delicious, healthy meal that only took a few minutes to cook. Quinoa is a great source of protein and fiber, so this dish is perfect for anyone looking for a nutritious meal.

Give it a try next time you’re in the mood for something quick and easy.

Instant Pot Quinoa is a delicious and easy side dish that you can make in a jiffy. Cooking quinoa in a pressure cooker takes anything complicated out of this dish and makes it into something delicious!

instant pot peppermint cheesecake

August 29, 2022 Uncategorized

Instant Pot Peppermint Cheesecake Recipe

This Instant Pot Peppermint Cheesecake recipe is filled with peppermint Andes mints and has a delightful peppermint bark OREO chocolate. There is nothing quite like an Instant Pot cheesecake – and this one is AMAZING!

A piece of cake on a plate, with Cheesecake

Peppermint Bark Cheesecake

Ever since I first got my Instant Pot, I have heard people giving rave reviews for making cheesecake.

I decided a while ago that cheesecake is probably my favorite type of dessert, so it only made sense that I wanted to try out one in the Instant Pot.

Now, most people go with a traditional cheesecake made with a graham cracker crust – filled with a creamy, white filling. Which is delicious, of course.

A close up of a piece of cake on a plate, with Cheesecake and Peppermint

However, I wanted to come up with something different for our readers.

With Christmas quickly approaching, peppermint is definitely on the mind. I had visions of a traditional base with peppermint Andes mints mixed in, laid on top of a chocolate peppermint crust, with whipped cream and crushed candy canes on top.

A piece of cake on a plate, with Cheesecake and Peppermint

I wasn’t sure how this was going to turn out, but in the end, it was perfect.

It was delicious. My kids loved it. My parents loved it. Forrest loved it. And I loved it.

A piece of cake on a plate, with Cheesecake and Peppermint

It was creamy with a distinct (but not overwhelming) peppermint taste. The chocolate crust was made with peppermint bark OREO cookies, which was the perfect touch.

A piece of cake on a plate, with icing

I loved the addition of the whipped cream on top with the crushed peppermint candy canes on top.

If you want to make a winning dessert this holiday season, I assure you – this one will be a huge hit.

A close up of a slice of cake on a plate

I used this Instant Pot Cheesecake recipe from My Baking Addiction as the start of my recipe, and I adapted it as needed.

The Crust

Any good cheesecake must have a good crust in my opinion! I really wanted this crust to be different.

Most cheesecake crusts are made with graham crackers or wafers, but when I saw the peppermint bark OREO cookies, I knew it was the perfect cookie.

I did not remove the filling of the OREO cookies – it worked perfectly just to pulse them all together into a crust.

I started with just three tablespoons of butter, but it was clear that I needed two more.

The crust was delicious. You could definitely just use regular OREO cookies, but I would suggest finding the peppermint bark ones if you can!

The Batter

The filling is a pretty classic cheesecake, just with a twist of the Andes Peppermint candies!

I was worried that the Andes mints would sink to the bottom of the batter, but they were evenly distributed throughout the entire cheesecake. It was perfect!

Notes and Tips

A piece of cake on a plate, with Cheesecake and Cream

When making this recipe, here are a few things to consider:

  • A lot of recipes suggest using a tin foil sling to lower the springform pan in and out of the pot. However, I found this to be kind of annoying, and I ended up just getting it out with the trivet handles.
  • Be careful with the steam! I tried to take it out too soon after I took the lid off, and I burned my hand. I would let it sit with the lid open for about 10-15 minutes.
  • Make sure you make this the day before. While it technically just needs eight hours in the fridge, I think it’s better if it can sit overnight.
  • It is easy for it to cook and set unevenly. Do your best to put the crust in as evenly as possible. Drop the pan gently to get the filling to settle. And make sure it’s placed evenly on the trivet!
  • We tried to use Reddi-wip for decoration around the edges, but it melted super fast. So either put that on right before serving or use a recipe like this one that is ideal for use at room temperature.

FAQ

chocolate peppermint cheesecake

Can I use another brand pressure cooker? I have only personally tested this with my Instant Pot, so I can’t guarantee the results of other pressure cookers. I’m sure the recipe can be used – it may just need to be adapted. I would recommend looking for cheesecake recipes for your specific pressure cooker to see what is suggested.

What Instant Pot did you use? I have a 6-quart DUO and an 8-quart DUO Ultra. This recipe was created and tested with the DUO Ultra. It should be successful in any 6 or 8-quart model.

How come there’s water on top of my cheesecake? You may notice this after it comes out of the Instant Pot – which is normal. It may have come from the condensation of the water within the pot during cooking. Just gently pour it off!

Can I use something other than Andes Mints? If you have some other kind of peppermint chocolate mix-in that you’d like to use, that’s fine! I was initially planning to use the peppermint baking chips from Andes, but all I could find were the candies. They worked great!

Where did you find the peppermint Andes Mints? This is a seasonal product. I’ve been able to find it at Target and Walmart.

How can I make this in my oven? I honestly am not sure 🙂 This is a great recipe for a classic cheesecake, so I would follow some of those instructions (while using the same preparation instructions in this post).

Can I use something other than Cool Whip? You can if you’d like! Homemade whipped cream is always a good option.

Do I have to use tin foil? Unless you know of an Instant Pot safe way to cover it, yes, I would use tin foil.

How can I make this healthier? I mean, it’s cheesecake – it’s typically a pretty decadent dessert 🙂 I used full-fat cream cheese, so you could consider using one that has less fat or even Greek yogurt-based cream cheese. I guarantee no results if you

What mixer do you use? I have both a Kitchen Aid Artisan and Bosch Universal Plus Mixer. I used the Kitchen Aid Artisan for this particular recipe.

Chocolate Peppermint Cheesecake

chocolate peppermint cheesecake

EQUIPMENT

  • Instant Pot
  • Trivet
  • 7″ Springform Pan
  • Stand Mixer or Hand Mixer
  • Food Processor or Blender

INGREDIENTS

Crust

  • 20 Peppermint Bark OREO cookies
  • 5 Tablespoons salted butter

Filling

  • 16 ounces cream cheese, softened
  • 1/2 cup white sugar
  • 2 large eggs
  • 1/4 quarter cup heavy cream
  • 1 Tablespoon all-purpose flour
  • 2 teaspoons vanilla
  • 20 peppermint Andes Mints

Topping

  • Cool Whip (or homemade whipped cream)
  • Crushed candy canes
  • Chocolate candy for the middle (optional)
peppermint cheesecake

DIRECTIONS:

Crust:

Spray the inside of your springform pan with cooking spray

A close up of a bottle

Put the OREO cookies in a blender or food processor and process until crumbled.

A close up of a bowl

Mix with melted butter.

oreo cheesecake crust

Press into the bottom of your springform pan evenly. Place in the freezer for 20 minutes.

Filling

A close up of a bowl, with cake batter

Beat cream cheese until smooth and no chunks remain.

Add in sugar and mix until creamy.

A cup, with Cheesecake and Peppermint

Add in eggs and beat until combined.

A close up of a batter of Peppermint cheesecake

Add in vanilla, flour, and heavy cream and mix until smooth.

Add broken up pieces of Andes mints into the batter.

A close up of cheesecake covered with foil for baking

Take the crust from the freezer and pour filling inside.

Cover the top and bottom of your pan tightly with tin foil.

Place your trivet in the bottom of your Instant Pot and place your pan on top.

Pouring water from a container

Pour one cup of water over the top of your pan.

Put the lid on your Instant Pot and set it to sealing.

A close up of an instant pot

Set timer for manual high pressure for 35 minutes.

A closeup of an instant pot

When the timer goes off, press cancel and let the pressure naturally release for 10 minutes, then release the rest of the pressure.

Let it cool for 10 minutes once you open the lid.

Cheesecake ready to bake

Remove from Instant Pot and place in the fridge overnight or at least eight hours.

andes peppermint cheesecake
Closeup of decorations on the cheesecaje

Shortly before serving, spread whipped cream on top and sprinkle with crushed peppermint candy canes.

instant pot peppermint cheesecake

Instant Pot Peppermint Cheesecake

Yield: 8 slices
Prep Time: 30 minutes
Cook Time: 1 hour
Total Time: 1 hour 30 minutes

This Instant Pot Peppermint Cheesecake recipe is filled with peppermint Andes mints and has a delightful peppermint bark OREO chocolate. There is nothing quite like an Instant Pot cheesecake - and this one is AMAZING!

Ingredients

Crust

  • 20 Peppermint Bark Oreos (or original)
  • 5 tablespoons salted butter

Filling

  • 16 ounces cream cheese, softened
  • 1/2 cup white sugar
  • 2 large eggs
  • 1/4 cup heavy cream
  • 1 Tablespoon all-purpose flour
  • 2 teaspoons vanilla
  • 20 peppermint Andes mints

Topping

  • Cool Whip (or homemade whipped cream)
  • Crushed candy canes
  • Chocolate candy for the middle

Instructions

Crust:

  1. Spray the inside of your springform pan with cooking spray
  2. Put the OREO cookies in a blender or food processor and process until crumbled.
  3. Mix with melted butter.
  4. Press into the bottom of your springform pan evenly. Place in the freezer for 20 minutes.

Filling

  1. Beat cream cheese until smooth and no chunks remain.
  2. Add in sugar and mix until creamy.
  3. Add in eggs and beat until combined.
  4. Add in vanilla, flour, and heavy cream and mix until smooth.
  5. Add broken up pieces of Andes mints into the batter.
  6. Take the crust from the freezer and pour filling inside.
  7. Cover the top and bottom of your pan tightly with tin foil.
  8. Place your trivet in the bottom of your Instant Pot and place your pan on top.
  9. Pour one cup of water over the top of your pan.
  10. Put the lid on your Instant Pot and set it to sealing.
  11. Set timer for manual high pressure for 35 minutes.
  12. When the timer goes off, press cancel and let the pressure naturally release for 10 minutes, then release the rest of the pressure.
  13. Let it cool for 10 minutes once you open the lid.
  14. Remove from Instant Pot and place in the fridge overnight or at least eight hours.
Nutrition Information:
Yield: 8 Serving Size: 1
Amount Per Serving: Calories: 761Total Fat: 53gSaturated Fat: 31gTrans Fat: 0gUnsaturated Fat: 17gCholesterol: 140mgSodium: 315mgCarbohydrates: 69gFiber: 3gSugar: 59gProtein: 9g
© Katie Clark
Cuisine: American / Category: Instant Pot Dessert Recipes

Other Posts You May Enjoy

  • Instant Pot Chocolate Banana Cake
  • White Chocolate Blackberry Cheesecake Cookie Recipe
  • The World’s Best Chocolate Cake Recipe
instant pot chicken and dumplings cracker barrel

August 11, 2022 Instant Pot Chicken Recipes

Instant Pot Chicken and Dumplings – Cracker Barrel Copycat Recipe

Are you looking for an easy and delicious chicken and dumplings recipe? Look no further than this Instant Pot Cracker Barrel Chicken and Dumplings Recipe! This easy recipe is simple to follow and is perfect for a cozy winter dinner in your pressure cooker. Give it a try today!

instant pot chicken and dumplings cracker barrel

Homemade chicken and dumplings is a classic comfort food dish that can be tricky to make. 

This recipe takes all of the guesswork out of making chicken and dumplings. You’ll have a delicious, hearty meal on the table in no time – it’s an easy chicken meal for sure!

This Instant Pot Cracker Barrel Chicken and Dumplings Recipe is sure to become a family favorite. The creamy sauce is extra-tasty, and the dumplings are cooked perfectly. This is a great recipe that you will love – and the best thing is that this delicious dish be done in less than one hour!

Ingredients

dumplings dough

Homemade Dumplings:

  • 2 cups flour
  • 1 cup water
  • 1 teaspoon Better than Bouillion Chicken flavor
  • 1 tsp baking powder
  • 1/2 tsp salt

Chicken and Dumplings

  • 1 lb frozen chicken tenderloins
  • 3 cups chicken broth
  • 1 cup milk
  • 1 teaspoon sugar
  • Salt (to taste)
  • Black Pepper (to taste)

What is the best way to shred chicken?

The best way to shred chicken is with a fork or a handheld mixer. We also like to use our bear claw shredders.

Can I make this recipe with fresh chicken?

Yes, you can make this recipe with fresh chicken. Just skip the chicken cooking portion and just bring everything to a boil on saute, including the chicken broth. You could also use rotisserie chicken.

shredded chicken

What if I don’t have better than Boullion – what can I use?

If you don’t have better than bouillon, you could use a teaspoon of poultry seasoning.

Can you use biscuit dough for the chicken and dumplings?

While we think homemade is best, you could definitely use refrigerated biscuit dough when you have a time crunch.

Can I use chicken thighs instead of tenderloins?

Yes, you could do this. You will need to increase the cooking time of the chicken, though.

Can I use heavy cream instead of milk?

Yes – I would use 3/4 cup heavy cream and 1/4 cup water.

What are dumplings?

Dumplings are a southern staple made of flour and a few other pantry staples. They are like thick and fat noodles, and they are absolutely delicious! They shouldn’t be confused with Chinese dumplings, which are completely different.

Recipe Instructions

Dumpling Directions

  1. Mix ingredients together into a ball.
  2. Flour surface
  3. Roll out to 1/8 inch thickness with a rolling pin and cut into squares using a pizza cutter

Chicken and Dumplings Directions

  1. Add chicken tenderloins and chicken broth to the Instant Pot
  2. Cook for 7 minutes on manual high pressure
  3. Quick release the pressure when the timer goes over
  4. Remove chicken and shred; set aside in a bowl
  5. To the hot broth, add milk, sugar, salt, pepper and butter and mix well
  6. Bring to light boil using the saute function set to low and add in in the pieces of dough for the dumplings for 15-20 minutes until you have nice and fluffy dumplings
  7. Season with additional salt and pepper if needed
  8. Add chicken back in and serve. 

What Instant Pot do you use?

We use the 6-quart Instant Pot for this recipe, however, you can definitely use an 8 quart!

How do you reheat Cracker Barrel’s chicken and dumplings?

We recommend reheating chicken and dumplings on the stove over medium heat until warmed through. You can also reheat them in the Instant Pot on saute mode.

spoonful of chicken and dumplings

How long does it take to steam dumplings in an Instant Pot?

It takes about 15-20 minutes to steam dumplings in an Instant Pot.

What else can I add to this recipe?

You could also add some chopped carrots, celery, and onion to this recipe. We like to add a little bit of everything to our Instant Pot meals! Bacon bits might also be a delicious addition to this recipe.

Can I make this recipe in a slow cooker?

Yes, you can make this recipe in a slow cooker. Crock pot chicken and dumplings is delicious! Just cook the chicken on high for 4 hours in chicken brothor on low for 6-8 hours. Then, add the remaining ingredients and the dumplings and cook on high for 30 minutes or until they are cooked through. It should taste just as delicious as the original recipe!

instant pot dumpling

Can I make this recipe gluten free?

Yes, you can make this Instant Pot Cracker Barrel Chicken and Dumplings Recipe gluten free. Just use a gluten free flour blend in place of the all-purpose flour and make sure your other ingredients are also gluten free.

What would be good sides to serve with this dish?

We think green beans, mashed potatoes, and cornbread would be great sides to serve with Instant Pot Cracker Barrel Chicken and Dumplings.

How long will this recipe last in the fridge?

This Instant Pot Cracker Barrel Chicken and Dumplings Recipe will last in the fridge for 3-4 days.

bowl of cracker and barrel chicken and dumplings

Can I freeze this recipe?

Yes, you can freeze Instant Pot Cracker Barrel Chicken and Dumplings. Just place them in a freezer safe container and they will last for 3-4 months.

How should you store the leftovers?

Store the leftovers in a fridge safe container for 3-4 days.

More Recipes You May Enjoy:

  • Instant Pot Chicken Tikka Masala
  • Instant Pot Chicken Alfredo
  • Easy Instant Pot Honey Garlic Chicken Recipe

This copycat Cracker Barrel Chicken and Dumplings Recipe made in the Instant Pot is a delicious and easy winter dinner that the entire family will love! Give this quick meal a try today!

instant pot chicken and dumplings

August 9, 2022 Uncategorized

Can You Put Foil In Your Instant Pot? What You Should Know!

Instant pots are a recent invention that has taken the world by storm. They are a pressure cooker, slow cooker, rice cooker, and more all in one! They are amazing for cooking large quantities of food quickly. But can you put foil in an instant pot? Keep reading to find out!

Can You Put Foil In Your Instant Pot?

Chances are if you have an Instant Pot- you love it! And use it quite frequently. And while they are super easy to use- there are questions that may pop up from time to time.

One question users typically ask is if it is okay to put foil in the Instant Pot.

Can you put foil in your Instant Pot?

The answer is yes- and there are several reasons why you might want to do so!

However, if you do wrap any of your food in foil- be aware that it may increase your cooking time because it may take more time for the steam to reach your food to cook it. So take that into consideration as you plan your meal.

Reasons to put foil in your Instant Pot

One reason to put foil in your instant pot is to create a makeshift steamer basket.

This is especially helpful if you are cooking multiple items at once and need to keep them separate.

Simply crumple up some foil and place it in the bottom of your pot. Then, add whatever you want to steam on top of the foil. The foil will prevent your food from coming into direct contact with the water, creating a makeshift steamer basket!

Another reason to use foil in your instant pot is to create a barrier between different foods.

This is helpful if you are cooking a dish that has multiple components, like a stew or chili.

By placing foil between the different ingredients, you can prevent them from melding together into one big mush. This is especially helpful if you are cooking for picky eaters who like their food to be separate.

Cooking your foods in aluminum foil can also help preserve juices and flavor.

The foil helps your food to cook in a slow and steady heat source. This will help your food to lock in all that juicy flavor and tenderness!

Bonus point- using foil can also help to make it an easy clean up!

With all this said – some people don’t feel that you should heat up aluminum, thus, they would say that it is NOT safe to put aluminum foil into the Instant Pot. In the end, it comes down to your comfort level with using aluminum foil!

Be sure to let us know if you have any questions in the comments!

more articles you may enjoy:

  • How Long Does An Instant Pot Take To Preheat?
  • Easy Instant Pot Butternut Squash Apple Soup Recipe
  • Easy Instant Pot Tomato Soup Recipe
Can You Put Foil In Your Instant Pot? What You Should Know!

August 9, 2022 Uncategorized

Why Won’t My Instant Pot Float Valve Go Down? 6 Culprits

The Instant Pot is an amazing appliance! But even the best appliances can have problems. One question you may find yourself asking is why your float valve isn’t going down. Keep reading to learn why that may be happening!

Why Won't My Instant Pot Float Valve Go Down?

If you are using your Instant Pot and notice your float valve isn’t going down then there could be a few reasons for it.

What is a float valve?

A float valve on the Instant Pot is a pin lock mechanism to keep the lid from being opened while it is pressurizing.

When there is enough pressure inside the inner pot, the float valve is pushed up by the pressure.

instant pot float valve

Why your float valve may not be going down

If your float valve is not going down then that means that your Instant Pot is having trouble sealing.

Why your Instant Pot may not be sealing

  • The sealing ring might not be properly seated or it is missing
  • The steam release button is in the down position
  • Food is stuck on the bottom of the inner pot
  • The lid is not closed properly
  • There isn’t enough liquid to create steam and bring the Instant Pot to pressure
  • The steam release handle is in the ‘venting’ position

Why your float valve may be stuck in the up position

If you discover that your float valve is stuck in the “up” position it might be because of stickiness or excess from leftover food. You can use a spoon to push down on the float valve to release anything in its way.

Do you have any more questions about the float valve on your Instant Pot? Let us know in the comments!

more articles you may enjoy:

  • How Long Does An Instant Pot Take To Preheat?
  • Easy Instant Pot Butternut Squash Apple Soup Recipe
  • Easy Instant Pot Tomato Soup Recipe
  • When Can I Open My Instant Pot? What You Should Know.
Why Won't My Instant Pot Float Valve Go Down? 6 Culprits

August 9, 2022 Uncategorized

When Can I Open My Instant Pot? What You Should Know.

Instant pots are all the rage right now. They are a great way to make quick and easy meals, and they can be a lifesaver on busy weeknights. But many people have been wondering when is the best time to open their Instant ot? Is it safe to open it before the timer goes off? In this article, we will answer that question for you!

when can i open my instant pot

The Instant Pot is one of the most convenient appliances out there. But there are a few key things that you will want to know before using it.

Many people wonder when the right time to open the Instant Pot lid is. It might seem like a simple task but it is an important one to understand!

When can I open my Instant Pot?

Get familiar with your Instant Pot’s float valve- because that is a crucial piece of knowing when you can open your Instant Pot.

What is the float valve?

The float valve is the metal tip that is dips inside the black plastic top of the lid.

What does the float valve look like when you can open the Instant Pot lid?

When the float valve is in line with the rest of the plastic your pot is fully pressurized and can not be opened due to the safety feature that prevents it.

When the valve has dropped down and clicked- it is safe to open your lid.

Can I open my Instant Pot lid before the timer goes off?

It is safe to open your instant pot before the timer goes off. However, there are a few things you should keep in mind when doing so.

First, make sure that the pressure has completely released before opening the lid and Make sure the float valve has dropped down – If it hasn’t, then wait until it has.

Second, be careful of the steam that will come out when you open the lid. It can be very hot, so make sure to use caution.

And finally, if your food isn’t quite done cooking, then you may need to add a few minutes onto the timer.

We hope that this was helpful! Be sure to let us know if you have any more questions about when you can open your Instant Pot!

more posts you might enjoy:

  • How to Boil Water in an Instant Pot in Two Minutes!
  • How Long Does An Instant Pot Take To Preheat?
  • Can your Instant Pot Lid Go In the Dishwasher? Tips for Cleaning
When Can I Open My Instant Pot? What You Should Know.

August 9, 2022 Uncategorized

Can your Instant Pot Lid Go In the Dishwasher? Tips for Cleaning

The Instant Pot was made for the ease and convivence of everyday cooking! But you may be wondering if any of the parts- particularly the lid- are dishwasher safe. Keep reading to find out!

Can your Instant Pot Lid Go In the Dishwasher

One of the best benefits of an Instant Pot is that it makes cooking dinner so much easier.

But can the same be said for cleanup? Today, we’ll talk about if the Instant Pot Lid can go in the dishwasher!

Can your Instant Pot Lid go in the dishwasher?

instant pot lid in front of dishwasher

The quick and easy answer to this question is yes- your Instant Pot lid can go in the dishwasher! YAHOO!!

This is one of the reasons this appliance is so handy and user-friendly. It helps you save time and avoid tedious tasks such as hand washing. The fact that you can put the lid in the dishwasher really speeds up clean-up time!

BEWARE:

Do NOT put the outer pot with all the buttons and electrical components in the dishwasher. Simply wipe this part down with dish soap and warm water.

How to clean your Instant Pot Lid

  • First, remove the float valve. You can find this on the bottom of the lid where you will find a small silicone cap. You will need to remove this cap in order to remove the valve
  • Remove the sealing ring. You can do this by peeling the ring away from the back of the sealing ring rack.
  • Remove the anti-block shield. The anti-block shield is the last Instant Pot lid component that needs to be removed before washing the lid in the dishwasher.
  • Place your lid in the dishwasher on the top rack in hot water.
  • The components you removed can be handwashed and dried and put back on the lid after it has gone through the wash.

We hope that this was helpful! Be sure to let us know if you’ve had luck putting your Instant Pot into the dishwasher!

more articles you may enjoy:

  • How Long Does An Instant Pot Take To Preheat?
  • Easy Instant Pot Butternut Squash Apple Soup Recipe
  • Easy Instant Pot Tomato Soup Recipe
can i put my instant pot lid in the dishwasher
instant pot refried beans

August 7, 2022 Instant Pot Side Dish

Easy No-Soak Instant Pot Refried Beans

Who doesn’t love refried beans? Here is an easy, Instant Pot refried bean recipe. They are so simple to throw together, and they pack in some great flavor. 

instant pot refried beans in bowl

Pressure Cooker Refried Beans

Are you looking for a quick and easy way to make refried beans? If so, you’ll love this recipe for Instant Pot Refried Beans. There’s no need to soak the beans overnight – they cook up quickly in the Instant Pot. And best of all, there’s no need to drain them – the bean broth becomes part of the refried beans.

So creamy and delicious! Give this recipe a try today. You won’t be disappointed!

How to Make Refried Beans in the Instant Pot

Ingredients:

  • 16 ounces dry pinto beans, rinsed and sorted
  • 1 ham hock
  • 2 cups chicken broth
  • 5 cups water
  • 3 cloves garlic
  • 1 teaspoon salt
  • 1 teaspoon ground cumin
  • 1/8 teaspoon cayenne pepper

Directions:

  1. Add all ingredients to inner pot.
  2. Turn pressure valve to sealed.
  3. Set on manual pressure for 45 minutes.
  4. After a 20-minute natural release, do a quick release to let out remaining pressure.
  5. Reserve 1 cup liquid, drain the beans and then discard the ham hock.
  6. Blend beans in a blender or food processor and add in reserved liquid as needed to reach desired consistency. You could also use a potato masher if you don’t mind if it’s a little chunkier. 
refried beans next to bowl

Where Do I Find Ham Hock?

This recipe uses ham hock, which, I know, sounds a little different. It makes this recipe even more delicious, though.

Fortunately, they shouldn’t be too hard to find. You should be able to buy one at your local grocery’s meat and seafood section.

Can I make these refried beans ahead of time?

These are best prepared right before serving for optimal taste and texture, however, you can reheat them if you need to.

How long can you keep refried beans in the fridge?

When stored in an air tight container, refried beans should last in the refrigerator about 3-4 days.

Can I make these vegetarian?

If you’d like to make these vegetarian, you will need to omit the ham hock and use a vegetable broth instead of the chicken broth.

Do I Need to Soak the Beans?

Nope! When cooking beans in the Instant Pot, there’s no need to soak your beans ahead of time.

pinto beans on wooden spoon

Easy No-Soak Instant Pot Baked Beans

Easy No-Soak Instant Pot Baked Beans

Yield: 10
Prep Time: 5 minutes
Cook Time: 1 hour 5 minutes
Total Time: 1 hour 10 minutes

Who doesn’t love refried beans? Here is an easy, Instant Pot refried bean recipe. They are so simple to throw together, and they pack in some great flavor. 

Ingredients

  • 16 ounces dry pinto beans, rinsed and sorted
  • 1 ham hock
  • 2 cups chicken broth
  • tap here
  • 5 cups water
  • 3 cloves garlic
  • 1 teaspoon salt
  • tap here
  • 1 teaspoon ground cumin
  • 1/8 teaspoon cayenne pepper

Instructions

Add all ingredients to inner pot.

Turn pressure valve to sealed.

Set on manual pressure for 45 minutes.

After a 20-minute natural release, do a quick release to let out remaining pressure.

Reserve 1 cup liquid, drain the beans and then discard the ham hock.

Blend beans in a blender or food processor and add in reserved iquid as needed to reach desired consistency. You could also use a potato masher if you don’t mind if it’s a little chunkier. 

Nutrition Information:
Yield: 10 Serving Size: 1
Amount Per Serving: Calories: 174Total Fat: 1gSaturated Fat: 0gTrans Fat: 0gUnsaturated Fat: 1gCholesterol: 6mgSodium: 411mgCarbohydrates: 29gFiber: 7gSugar: 1gProtein: 11g
© Katie Clark
Cuisine: Mexican / Category: Instant Pot Mexican Recipes

Are these refried beans gluten-free?

Yes, but always double-check the ingredient lists for ingredients you purchase to double check!

What are some substitutions?

  • Instead of the ham hock, you could use some bacon.
  • You could use vegetable broth instead of chicken broth
  • You could use black beans instead of pinto beans
  • You can add some lime juice for some added zing and flavor
refried beans in red bowl with jalapeno on top

How many refried beans should you plan on per person?

I usually suggest 1/2 a cup for children and 1 cup for adults.

These easy no-soak refried beans are a dump-and-go recipe that come together quickly in the Instant Pot. They’re perfect for busy weeknights or whenever you need a quick and delicious side dish.

Give them a try the next time you’re looking for an easy, tasty, and healthy recipe that everyone will love.

More Tex Mex Side Dishes:

  • Instant Pot Chicken Tikka Masala
  • Instant Pot Pulled BBQ Pork
  • Instant Pot Chicken Fajita

Homemade refried beans are the BEST, and they are very easy to make. This recipe for Instant Pot refried beans are so delicious and make for the perfect side dish.

  • « Go to Previous Page
  • Page 1
  • Interim pages omitted …
  • Page 3
  • Page 4
  • Page 5
  • Page 6
  • Page 7
  • Page 8
  • Go to Next Page »

Copyright © 2024 · whatsinthepot.com. Privacy Policy.